
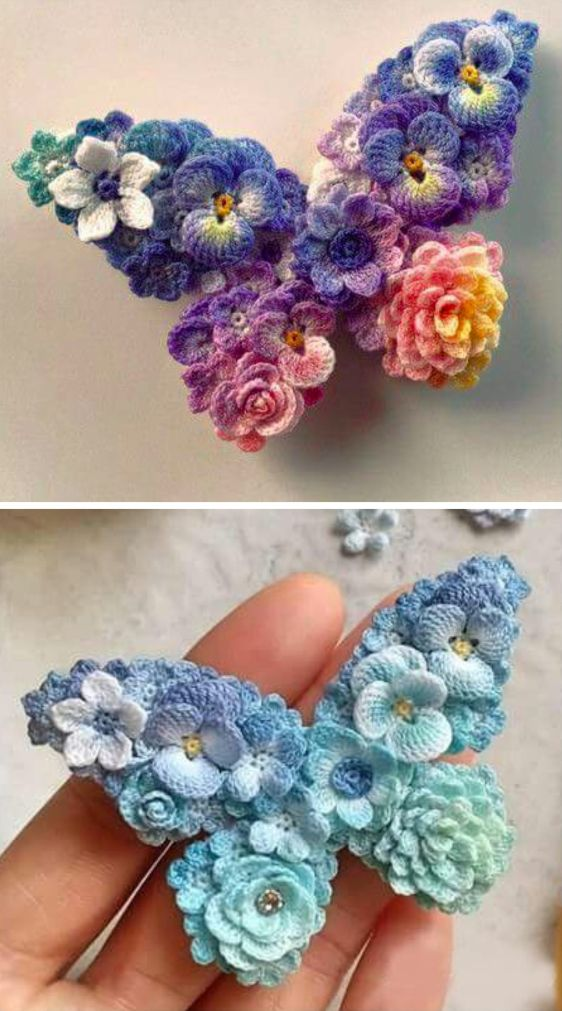
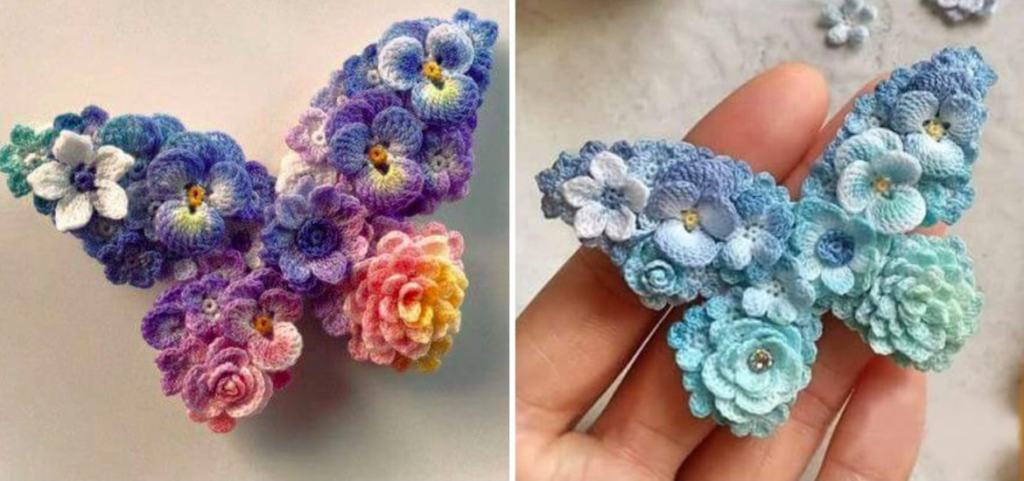
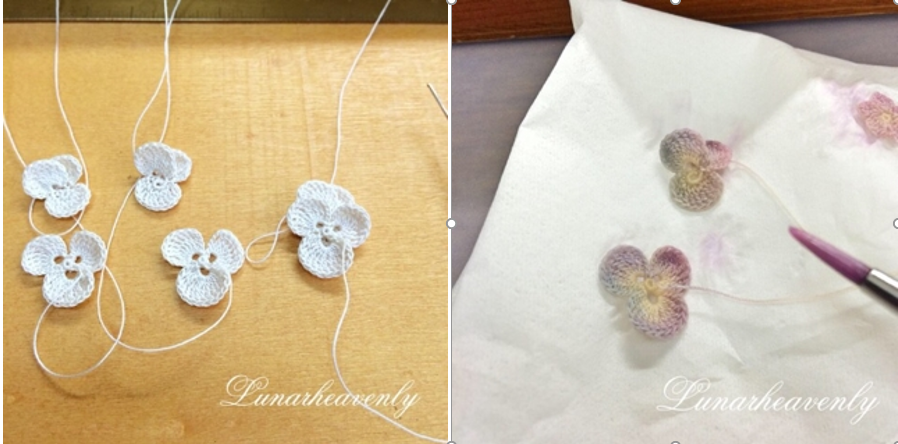
Crochet Butterfly: Learn How to Make It (Free Pattern)
Crocheting butterflies is a fun and creative way to explore new techniques while creating charming and colorful accessories, home decor items, or even gifts. In this detailed guide, we will walk you through how to crochet a beautiful butterfly, including step-by-step instructions and tips. Whether you are a beginner or an experienced crocheter, this pattern is easy to follow and can be customized to suit your preferences.
Materials Needed
Before we dive into the pattern, let’s gather everything you’ll need to create your crochet butterfly:
- Yarn: You can use any yarn you prefer. For this project, a medium-weight yarn (worsted weight) is ideal, but you can experiment with lighter or heavier yarns depending on the desired size of your butterfly. Choose a yarn that’s soft and easy to work with.
- Crochet Hook: A 3.5mm to 4mm hook (US size E-4 or G-6) should work well for medium-weight yarn. Adjust the hook size based on your yarn thickness.
- Tapestry Needle: This will help you weave in the ends when you’re finished.
- Scissors: For cutting your yarn.
Optional:
- Beads or Buttons: You can sew a small bead or button in the center of the butterfly for extra decoration.
- Embroidery Floss: For adding antennae or detailing.
Crochet Butterfly Pattern (Step-by-Step)
Abbreviations Used
Before starting, make sure you’re familiar with these common crochet abbreviations:
- ch = chain
- sc = single crochet
- dc = double crochet
- sl st = slip stitch
- tr = treble crochet
- st(s) = stitch(es)
- sp = space
Instructions
Step 1: Start the Butterfly’s Body
- Begin with the body: Start by making a foundation chain of 5 stitches.
- Row 1: In the second chain from the hook, make 1 single crochet (sc) and continue across to the end of the chain, making 1 sc in each stitch. You should have 4 single crochet stitches. Turn your work.
- Row 2: Ch 1, then work 1 sc in each stitch across. Turn. Repeat this step for 3 rows (or until the body is long enough for your liking, usually about 1.5-2 inches).
- Finish the body: Fasten off your yarn, leaving a long tail for attaching the body to the wings later.
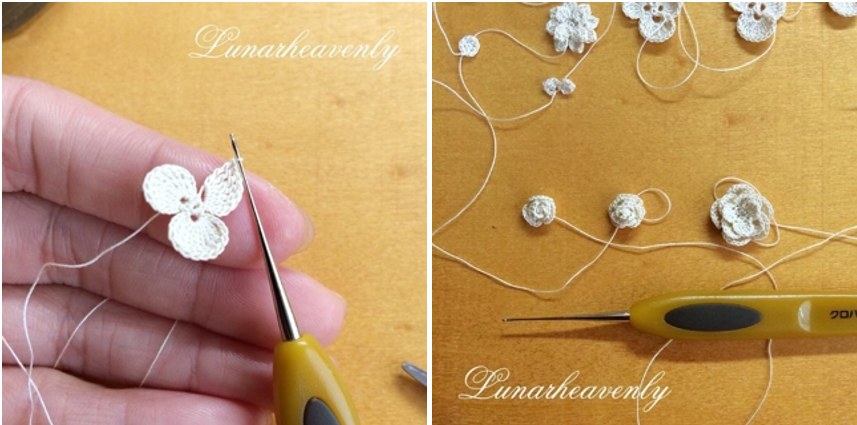
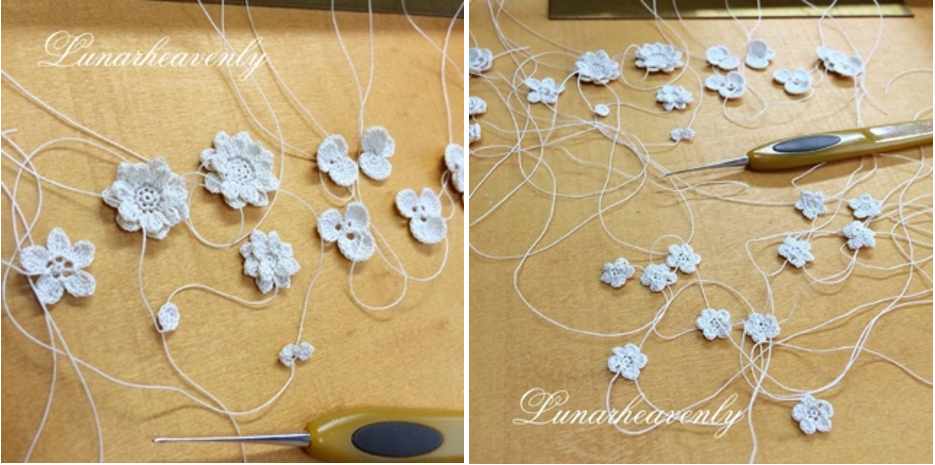
Step 2: Make the Butterfly Wings
Now, let’s create the butterfly wings. The wings are made in two parts: the top wings and the bottom wings.
Top Wings:
- Start with a magic ring or ch 4 and join with a slip stitch (sl st) to form a ring.
- Round 1: Ch 3 (this counts as your first double crochet (dc) stitch), and work 11 dc into the ring. Join with a sl st to the top of the starting ch-3. You should have 12 dc in total.
- Round 2: Ch 3, 1 dc in the next st, 2 dc in the next st; repeat from * around, join with a sl st to the top of the starting ch-3. You should have 18 dc in total.
- Round 3: Ch 3, 1 dc in the next 2 sts, 2 dc in the next st; repeat from * around, join with a sl st to the top of the starting ch-3. You should have 24 dc in total.
- Finish the top wing: Fasten off, leaving a long tail for attaching the wings to the body.
Bottom Wings:
- Start with a magic ring or ch 4 and join with a sl st to form a ring.
- Round 1: Ch 3 (counts as your first dc), and work 8 dc into the ring. Join with a sl st to the top of the ch-3.
- Round 2: Ch 3, 1 dc in the next st, 2 dc in the next st; repeat from * around, join with a sl st to the top of the starting ch-3. You should have 12 dc in total.
- Round 3: Ch 3, 1 dc in the next st, 2 dc in the next st; repeat from * around, join with a sl st to the top of the starting ch-3. You should have 18 dc in total.
- Finish the bottom wing: Fasten off, leaving a long tail for attaching.
Step 3: Attach the Wings to the Butterfly Body
- Position the wings: Lay the top and bottom wings out flat, positioning them so that the top wing is above the bottom wing, with some overlap.
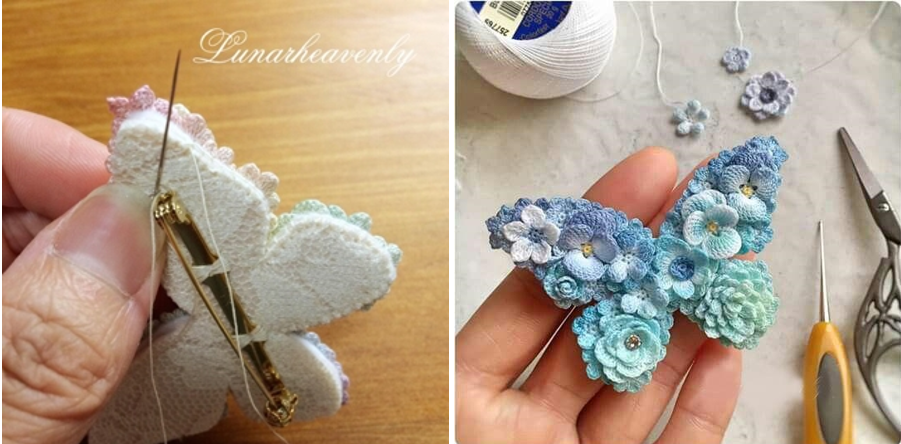
- Sew the wings to the body: Using the long yarn tail from the body and a tapestry needle, attach the top wing first, securing it in place on the upper portion of the body. Then, sew the bottom wing onto the lower portion of the body. Use the yarn tail of the wings to attach them securely, ensuring that the butterfly is symmetrical and the wings are evenly spaced.
- Secure ends: Weave in any loose ends of yarn.
Step 4: Add Antennae (Optional)
If you’d like to add antennae, you can use a small amount of black or contrasting yarn to make a couple of chains.
- Make the antennae: Ch 6, then sl st into the last stitch to form a loop. Repeat to create a second antenna.
- Attach: Using a tapestry needle, sew the antennae to the top of the butterfly’s body.
Step 5: Finishing Touches
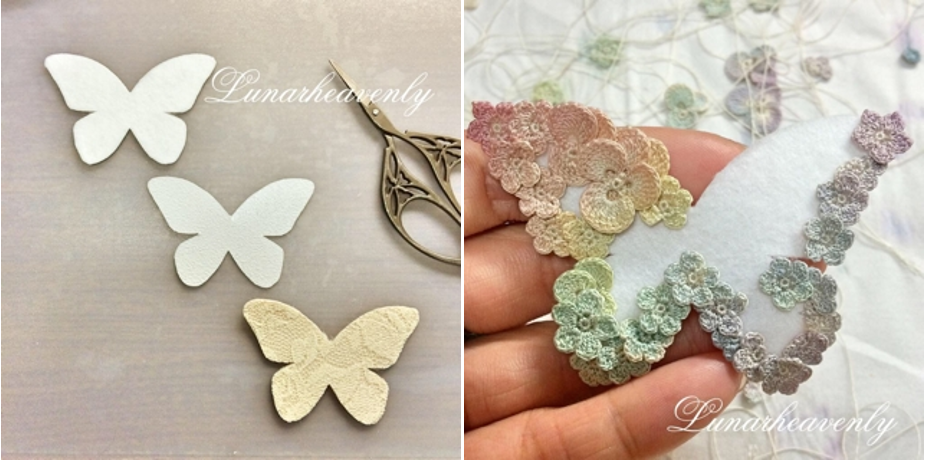
Feel free to embellish your butterfly with beads, sequins, or other decorative details. You could also crochet smaller butterflies in different colors and use them as embellishments for clothing, bags, or home decor items.
Customizing Your Crochet Butterfly
The beauty of crochet is that you can make it your own! Here are some ways to customize your butterfly:
- Use different yarn colors: Create multicolored butterflies by changing yarns after each round. You could even make rainbow butterflies for a fun, vibrant look.
- Size variations: Adjust the size of the butterfly by changing the yarn weight or hook size. You can also adjust the number of stitches or rounds to make the butterfly larger or smaller.
- Textural effects: Add texture by using different stitch patterns like bobble stitches, shell stitches, or puff stitches in the wings.
Where to Use Your Crochet Butterfly
There are countless ways to incorporate your crochet butterfly into your daily life or creative projects. Here are a few ideas:
- Clothing: Sew a butterfly onto a hat, sweater, or scarf for a whimsical touch.
- Accessories: Attach your butterfly to a keychain, hairpin, or bag for a charming accent.
- Home Decor: Use butterflies to decorate pillows, blankets, or curtains.
- Gifts: Crochet a set of butterflies and use them to decorate cards or gift tags.
Conclusion
Crocheting a butterfly is an enjoyable and versatile project that can be tailored to your style. Whether you want a simple, elegant butterfly or a colorful, intricate one, this free pattern offers endless possibilities for customization. With just a few basic crochet skills, you can make these beautiful butterflies and add a personal, handmade touch to all sorts of creations. Happy crocheting!


