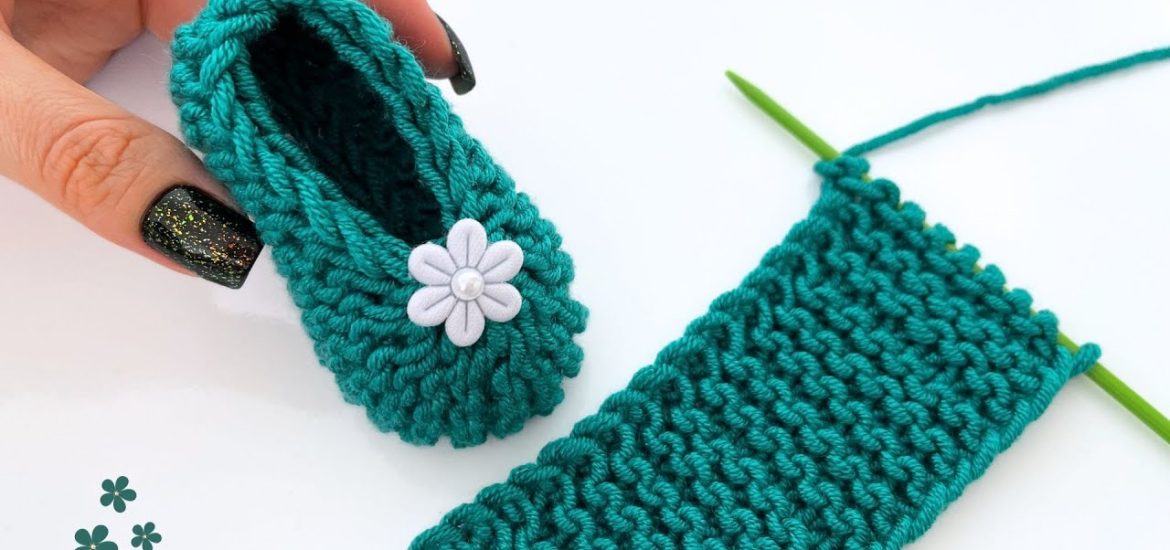
Crochet Baby Slippers: A Detailed Guide to Making Adorable Footwear
Crochet baby slippers are a fantastic project for both beginner and experienced crocheters alike. These tiny, soft shoes are not only adorable but also a thoughtful gift for baby showers or any occasion. In this guide, we’ll walk you through step-by-step instructions on how to crochet baby slippers, including tips on yarn selection, sizing, and how to personalize your creations. Whether you’re a seasoned pro or just starting out, this pattern will help you create a lovely pair of slippers for the little ones in your life.
Materials Needed
Before starting, ensure you have the right materials to create beautiful baby slippers:
- Yarn: Choose a soft, comfortable yarn that’s gentle on baby’s delicate skin. A worsted weight yarn (size 4) is ideal for most baby slipper patterns, though you can adjust your yarn choice depending on the slipper size you wish to make. Look for yarn labeled as “baby yarn” for extra softness.
- Crochet Hook: A 3.5mm (E) or 4mm (G) crochet hook should work well for worsted weight yarn.
- Tapestry Needle: For weaving in loose ends and sewing parts of the slippers together.
- Scissors: To cut your yarn.
- Stitch Markers (optional): To mark the beginning of rounds.
Optional:
- Buttons, Ribbons, or Flowers: For decoration, you can add small accessories like buttons or crocheted flowers to embellish the slippers.
- Anti-slip Soles: If you want the slippers to be safer for babies who are starting to walk, you can add anti-slip soles or fabric strips to the bottom.
Abbreviations Used
- ch = chain
- sc = single crochet
- hdc = half double crochet
- dc = double crochet
- sl st = slip stitch
- st(s) = stitch(es)
- inc = increase (work 2 stitches into the same stitch)
- dec = decrease (work 2 stitches together)
Crochet Baby Slipper Pattern
In this pattern, we will cover making a simple yet cute pair of baby slippers. This pattern is designed for babies around 0-6 months but can be adjusted to larger sizes by adding more rounds. The slippers are worked in the round to create a seamless and cozy fit.

Step-by-Step Instructions
Step 1: Make the Sole
The first step in creating the baby slippers is to crochet the sole, which will form the base of the slipper.
- Start with a Magic Ring or chain 4 and join with a slip stitch to form a ring.
- Round 1: Ch 1, work 6 sc into the ring. Pull the ring tight to close it. (6 stitches)
- Round 2: Ch 1, work 2 sc in each stitch around (12 stitches).
- Round 3: Ch 1, 1 sc in the next stitch, 2 sc in the next stitch; repeat from * around (18 stitches).
- Round 4: Ch 1, 1 sc in the next 2 stitches, 2 sc in the next stitch; repeat from * around (24 stitches).
- Round 5: Ch 1, 1 sc in the next 3 stitches, 2 sc in the next stitch; repeat from * around (30 stitches).
- Round 6: Ch 1, 1 sc in the next 4 stitches, 2 sc in the next stitch; repeat from * around (36 stitches).
This is the basic sole shape, and it should be approximately the size of the baby’s foot. If you need a larger slipper, continue increasing in the same pattern (adding one extra stitch before the increase in each round) until the sole is the correct length.
Fasten off the yarn and leave a long tail to sew the sole to the slipper body.
Step 2: Create the Slipper Body
Now that the sole is ready, we will crochet the sides of the slipper to form the body.
- Attach yarn to the sole: Choose a new color for the slipper body (optional), and attach it to any stitch along the edge of the sole.
- Round 1: Ch 1, work 1 sc in each stitch around, making sure to crochet around the edges of the sole. (You may need to adjust the number of stitches depending on the number of stitches you have in the last round of the sole.) Join with a sl st to the first sc.
- Round 2: Ch 1, 1 sc in the next stitch, 2 sc in the next stitch; repeat from * around. Join with a sl st to the first sc.
- Round 3: Ch 1, 1 sc in the next 2 stitches, 2 sc in the next stitch; repeat from * around. Join with a sl st to the first sc.
- Rounds 4-6: Ch 1, work 1 sc in each stitch around. Repeat for three rounds or until the slipper body reaches the desired height for the baby. You can also change colors for a fun design at this point.
- Fasten off: When the slipper body is the correct height, fasten off and leave a long tail for finishing.
Step 3: Create the Heel
The heel of the slipper will give it a nice shape and help the slipper stay on the baby’s foot.
- Fold the slipper: Fold the slipper in half so that the back (heel) is aligned. Use a tapestry needle and the long tail to sew up the back of the slipper.
- Sew the heel: Run a few stitches along the back edge to securely join the two sides of the slipper.
- Fasten off: After sewing the heel, fasten off and weave in any remaining ends.
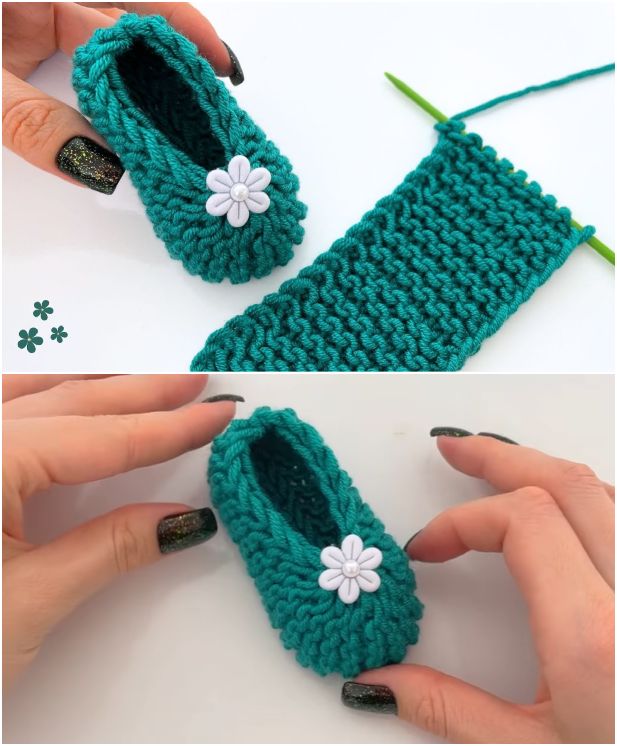
Step 4: Add Embellishments (Optional)
Now that the basic slippers are complete, you can personalize them with cute embellishments. Here are some ideas:
- Add buttons or bows: Sew a small button or crochet a tiny bow to decorate the front of the slipper.
- Crochet a flower: A small crochet flower or a heart motif can make the slippers even cuter.
- Add an anti-slip sole: If you want the slippers to be safer for a baby starting to move around, sew an anti-slip sole (often available in fabric or rubber) to the bottom of the slippers.
Tips for Customizing
- Color combinations: Choose vibrant or pastel yarns to make your baby slippers stand out. Stripes or ombré effects can also add an interesting design element.
- Adjusting for size: To make slippers for older babies (6-12 months), simply increase the number of stitches in each round, add more rounds to the sole and body, or use a thicker yarn and larger hook.
- Tighter fit: If you want a snugger fit, you can reduce the number of stitches in the first few rounds of the slipper body, ensuring that the slipper fits securely around the ankle.
Where to Use Your Crochet Baby Slippers
Crochet baby slippers are versatile and can be used in many ways:
- Baby Showers: Baby slippers make the perfect gift for expecting parents. You can gift them along with other handmade items like blankets or hats.
- Photo Shoots: These adorable slippers are a wonderful prop for baby photo shoots, adding a personal touch to the memories.
- Everyday Use: Keep babies’ feet warm and cozy with a handmade pair of slippers that are soft and gentle on their skin.
- Gifts: Crocheted baby slippers are a heartfelt and practical gift for friends or family with babies.
Conclusion
Crocheting baby slippers is a fun and rewarding project that creates beautiful, functional gifts. With the step-by-step instructions provided, you can easily make a pair of soft, comfy slippers for little ones. Whether you’re gifting them to a friend, using them for your own child, or adding embellishments to make them extra special, these slippers will surely bring joy to the recipient. Enjoy the process, and happy crocheting!
Video:


