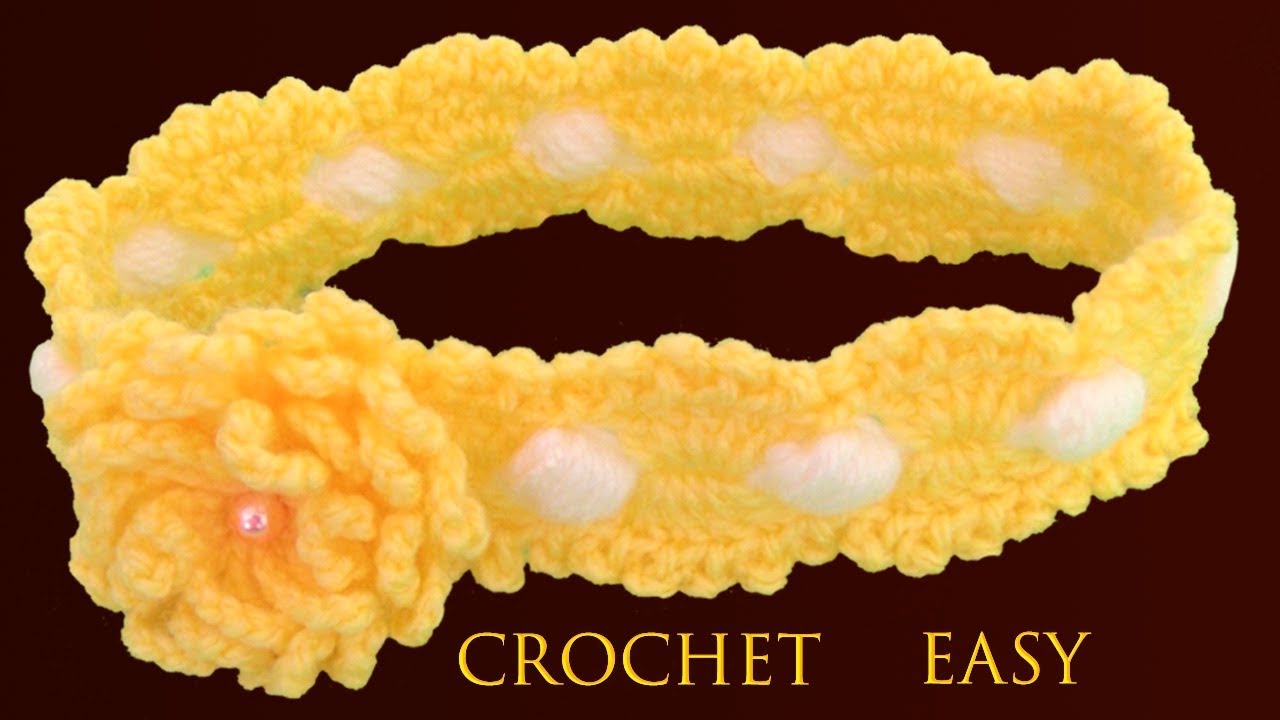
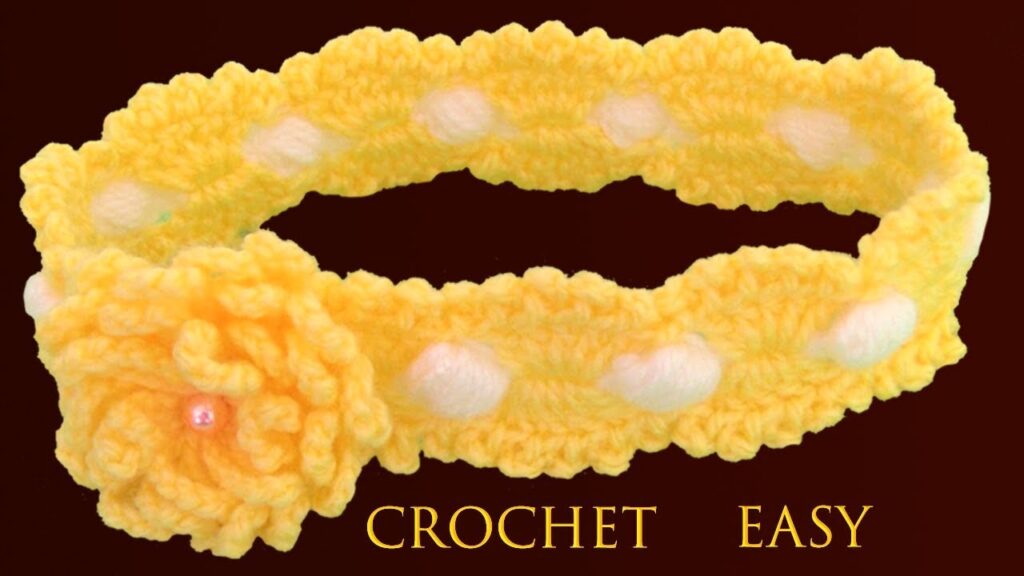
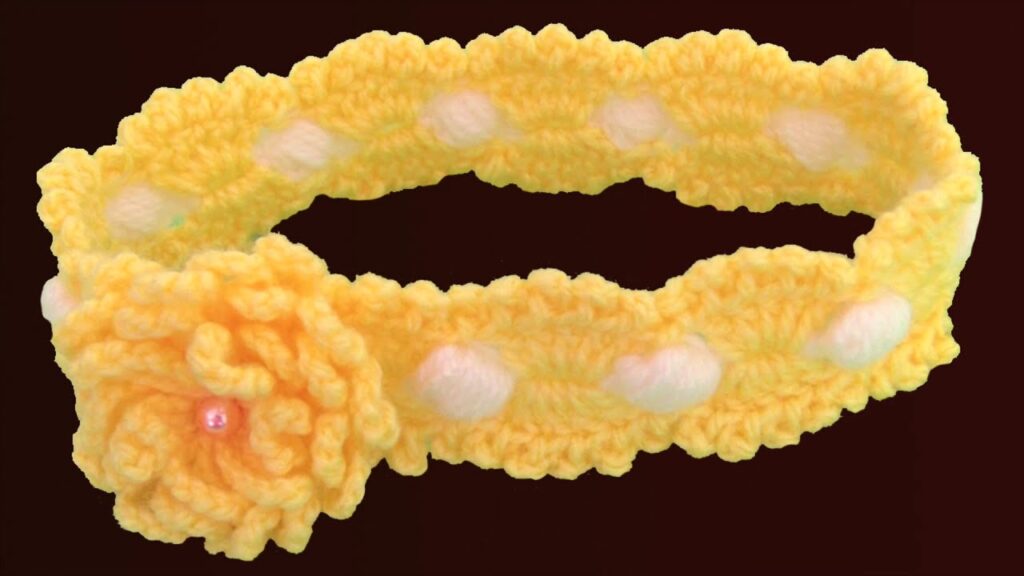
This headband combines a structural, elastic base with a frilled, scalloped border, giving it a charming, lace-like appearance. The base uses a modified Puff Stitch technique to create a padded, cozy feel.
🌸 Materials & Gauge
| Item | Details |
| Yarn | Color A (Base): Approx. 50g of sport-weight (Category 2) or light DK-weight (Category 3) yarn in white, cream, or a neutral color. |
| Yarn | Color B (Border): Approx. 30g of sport-weight yarn in pink or a contrast color. |
| Hook | 3.0 mm crochet hook. |
| Notions | Scissors, tapestry needle for weaving ends and seaming. |
| Decoration (Optional) | A separate, pre-made crochet flower (like the chain-rose referenced in the video). |
Sizing and Gauge
This pattern is easily adjustable by simply repeating the foundation motif until the desired length is reached.
| Size | Suggested Motifs (Base Squares) | Approximate Length |
| Baby/Toddler | 6–7 Motifs | 16-17 inches |
| Child (4-10 yr) | 8–10 Motifs | 18-20 inches |
| Adult/Teen | 11 Motifs (Pattern Default) | 21-23 inches |
US Crochet Terminology:
- Ch: Chain
- Sl St: Slip Stitch
- SC: Single Crochet
- DC: Double Crochet (equivalent to Punto Alto in the video)
- 8-Puff: 8-Loop Puff Stitch (described below)

🧱 Part 1: The Headband Base (Color A)
The foundation is built in a single long row, creating alternating “eyelet” spaces and “puff-squares.”
Special Stitch: 8-Loop Puff (8-Puff)
- Yarn Over (YO), insert hook into the indicated stitch/space.
- YO and pull up a long loop (Loop 1).
- Repeat steps 1 and 2 7 more times into the same stitch/space. (You will have 17 loops on your hook: 8 pulled loops and 8 YOs plus the original loop).
- YO and pull through all 17 loops.
- Ch 1 to close the puff. (This last Ch 1 does not count as a chain for the next step).
Row 1: Foundation Motifs
- Start with a slip knot.
- Ch 3. This chain forms the side of the first motif.
- Eyelet 1: YO, insert hook into the very first chain made, YO and pull up a long loop, YO and complete a DC. (This creates the first eyelet space).
- Puff Square 1: Ch 3.
- YO. Now, work an 8-Puff into the top of the DC you just made.
- Sl St to close the puff.
- Repeat Sequence: Continue alternating an eyelet and a puff square:
- Eyelet: Ch 3. YO. Work 1 DC into the top center of the last closed 8-Puff.
- Puff Square: Ch 3. Work an 8-Puff into the top of the DC you just made. Sl St to close.
- Continue this sequence until you have completed 11 Puff Squares (or your desired count for length).
- Final Eyelet: End the row with an eyelet (Ch 3, DC into the top of the last closed Puff).
- Final Puff Square: Ch 3. Work an 8-Puff into the last DC. Sl St to close.
- Fasten off Color A, leaving a tail for weaving.
🌊 Part 2: The Scalloped Edge (Color B)
The scallop border is worked along the long, straight edge of the foundation row (the side with the puff stitches) and then around the ends.
Row 2: Scallop Border (Worked along the long edge)
- Attach Color B into the corner of the first Puff Square.
- Sl St to secure.
- Working along the side of the first Puff Square: (You will work 5 small ruffles/scallops into this square’s side):
- Repeat 5 Times: Work 1 DC into the side of the puff square, then Ch 3, then Sl St into the DC just made. (This creates a tiny picot/wave on top of the DC).
- Sl St into the next corner space (where the Eyelet and Puff Square meet).
- Working in the Eyelet Space: Repeat the 5-scallop sequence into the DC of the eyelet space.
- Repeat 5 Times: Work 1 DC into the eyelet space, then Ch 3, then Sl St into the DC just made.
- Sl St into the next corner space.
- Continue repeating this pattern of 5 scallops into each Puff Square and 5 scallops into each Eyelet space all the way down the long edge of the headband until you reach the end.
- Turning the Corner (The Short Edge): When you reach the end, you need to work extra scallops to form a smooth curve:
- Work 10 scallops (DC, Ch 3, Sl St) evenly spaced around the short, curved end of the headband.
- Sl St to secure.
- Continuing on the Second Long Edge: Now, work back down the opposite long side, mirroring the first side:
- Work the alternating pattern of 5 scallops into each Puff Square and 5 scallops into each Eyelet space.
- Continue until you reach the last corner/starting point.
- Final Corner: Work 10 scallops evenly spaced around the second short, curved end.
- Sl St to join at the starting point.
- Fasten Off Color B, leaving a long tail (approx. 10 inches) for seaming.
🎀 Part 3: Assembly & Finishing
The final step is to join the two short ends of the headband to form a continuous loop and add the flower embellishment.
- Seaming the Ends:
- Thread the long tail of Color B onto a tapestry needle.
- Turn the headband so the wrong side is facing you.
- Align the two short ends carefully. Since the scalloped edges are wide, you will only be seaming the base motifs.
- Using the tapestry needle, whipstitch or mattress stitch the base motifs together, ensuring the puff squares line up smoothly.
- Secure the seam and weave in all remaining ends.
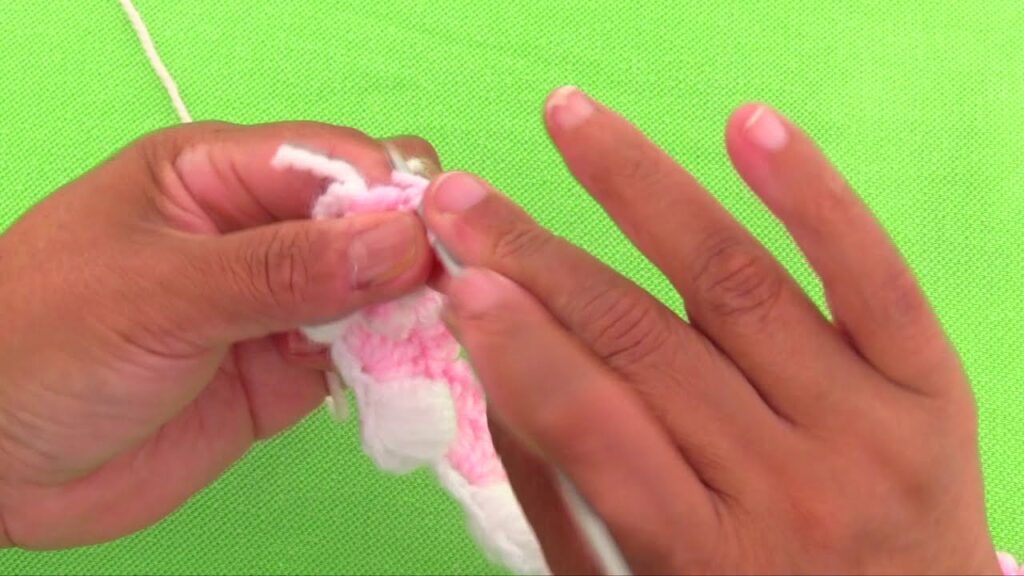
- Attaching the Decoration:
- The video uses a separate, pre-made crochet rose as the decoration. (The pattern for this rose is referenced in the video description).
- Find the seam you just created—this is often the neatest place to hide the join and is a natural focal point.
- Using the pink yarn tail (or new yarn), position the flower over the seam.
- Securely stitch the flower to the headband with small, neat stitches, making sure the knots are on the inside of the band.
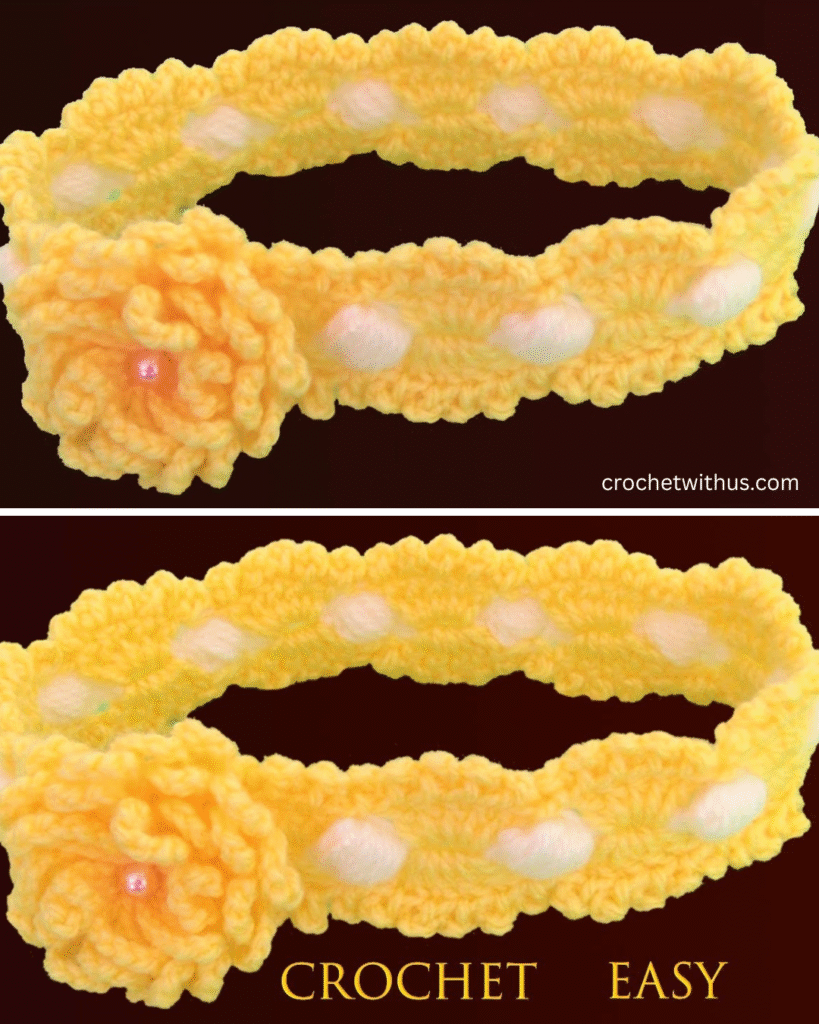
The “Rosita Bloom” Headband is now complete! It is a stylish and textural accessory that is easy to customize in terms of size and color.
Video tutorial:


