
Introduction: Beyond the Square
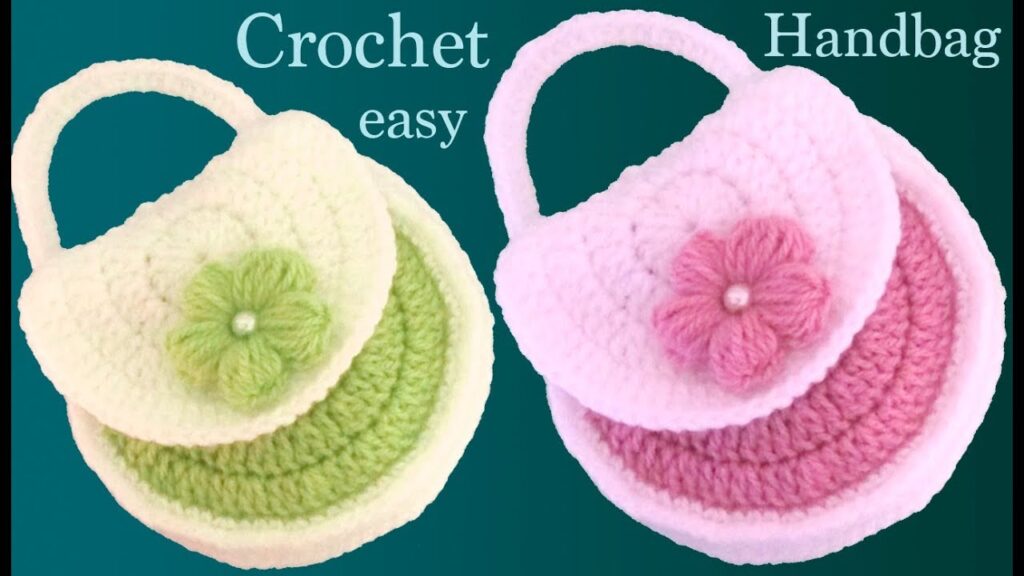
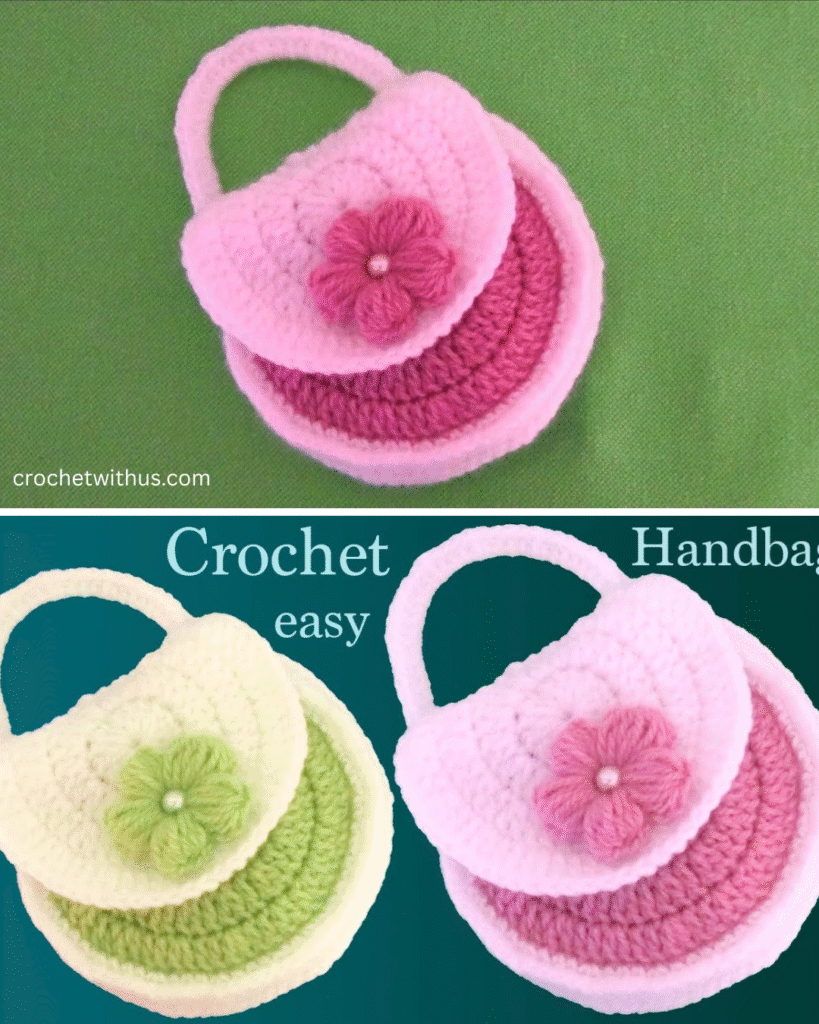
The true joy of crochet lies in its versatility—the ability to turn a simple strand of yarn into complex, three-dimensional objects. Inspired by the clever modular assembly of the circular crochet coin purse (as seen in the tutorial linked below), we’ve designed an original, intermediate-level pattern: The Petal Pouch Modular Bag.
This project elevates the simple circular motif by adding decorative “petal” shaping and joining four distinct circles—instead of three—to create a rounded, roomy shoulder bag or large drawstring pouch. The four-piece construction results in a unique, squarish bottom while maintaining the lovely soft curve of the joined circles.
Ready to combine the elegance of floral design with the satisfaction of modular construction? Let’s hook our way to this unique accessory!
Section 1: The Philosophy of Form and Function
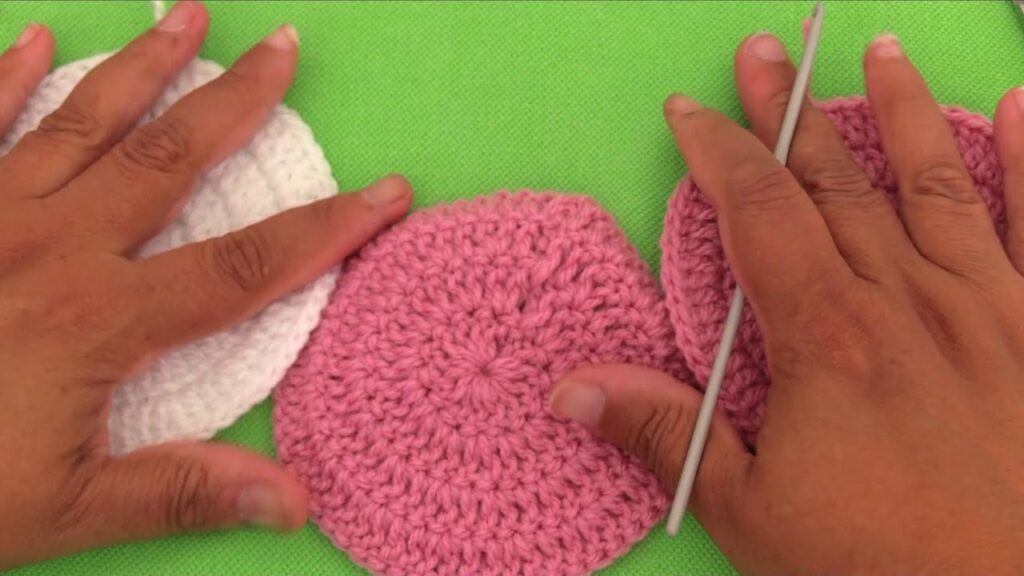
The inspiring video by tallermanualperu demonstrates how basic circular components can be sewn together to form a structured object with a built-in flap. Our “Petal Pouch” pattern builds on this foundation by:
- Creating Textured Edges: Introducing a slight ripple or “petal” effect to the edges of the circles for a more organic look.
- Adding Volume: Using four circles ensures a wider, more stable base, making the bag capable of holding more than a simple coin purse.
- Defined Opening: The pattern incorporates a final round of ribbing to create a sturdy channel for a drawstring or strap.
Section 2: Gathering Your Supplies (The Blooming Basket)
Sturdy yarn is essential for a bag to maintain its shape, particularly for a project with multiple joining points.
The Material Checklist
| Item | Quantity | Notes |
| Primary Yarn (A) | 200 grams | A sturdy, non-stretching yarn like Cotton, T-shirt Yarn (if thin), or a Cotton/Acrylic blend. Choose a soft main color. |
| Accent Yarn (B) | 50 grams | Same weight as Yarn A. For the joining round and the final edge (e.g., a contrasting deep green or a neutral cream). |
| Crochet Hook | 4.0mm to 5.0mm | Select a size that creates a tight, dense fabric with your chosen yarn. |
| Lining Fabric | 1/2 yard | Optional, but highly recommended. Lightweight cotton is easiest to work with. |
| Drawstring/Strap | 1.5 Yards | A matching cord, woven ribbon, or a crocheted strap for carrying. |
| Hardware | 4 Stitch Markers | Essential for aligning the circles during the joining process. |
The Tool Checklist
- Scissors
- Yarn Needle (Tapestry Needle)
- Measuring Tape
- Pins/Clips for joining
- Needle and matching thread (for lining, if used)
Section 3: The Step-by-Step Pattern (Crocheting the Petal Circles)
You will create four identical circles using Yarn A. The key to the “petal” effect is an intentional change in the increase pattern in the final rounds. We will use Half Double Crochet (HDC) for better structure.
Finished Circle Diameter Goal: Approximately 6.5 to 7 inches.

Stage 1: Crocheting the Foundation Circles (Make 4 in Yarn A)
We use a standard HDC circle increase pattern, maintaining a total of 10 increases per round.
- Round 1 (Foundation): Start with Magic Ring (MR). Ch 2 (counts as first HDC). Work 9 more HDC into the ring. Sl st to the top of the starting Ch 2. (10 HDC)
- Round 2 (Increase): Ch 2. Work 1 HDC in the same stitch. Work 2 HDC in every stitch around. Sl st. (20 HDC)
- Round 3 (Increase): Ch 2. Work 2 HDC in the next stitch, then 1 HDC in the following stitch. Repeat from * around. Sl st. (30 HDC)
- Round 4 (Increase): Ch 2. Work 2 HDC in the next stitch, then 1 HDC in each of the next 2 stitches. Repeat from * around. Sl st. (40 HDC)
- Round 5 (Increase): Ch 2. Work 2 HDC in the next stitch, then 1 HDC in each of the next 3 stitches. Repeat from * around. Sl st. (50 HDC)
Stage 2: Creating the Petal Edge
We now add the final two decorative rounds to achieve a slightly scalloped, defined edge.
- Round 6 (Definition): Ch 2. Work 1 HDC in every stitch around. (No increases). This round sets a baseline and helps the circle maintain a flat edge, making the next round’s scallop more defined. Sl st. (50 HDC)
- Round 7 (Scallop/Petal): Ch 1 (does not count as a stitch). Skip 1 stitch, work 5 DC in the next stitch, skip 1 stitch, work 1 SC in the next stitch. Repeat from * around. You should have a final SC or Sl St to finish the round. Fasten off. (10 Petals)
You should now have 4 identical “Petal Circles” made with Yarn A.
Stage 3: Joining the Discs (The Core Structure)
This step creates the three-dimensional bag body. We will join the circles to form a cubic-like structure.
- Arrangement: Place your four circles side-by-side in a square formation. Label them mentally: Top (T), Bottom (B), Left (L), Right (R). The “Petal” edges should all face out.
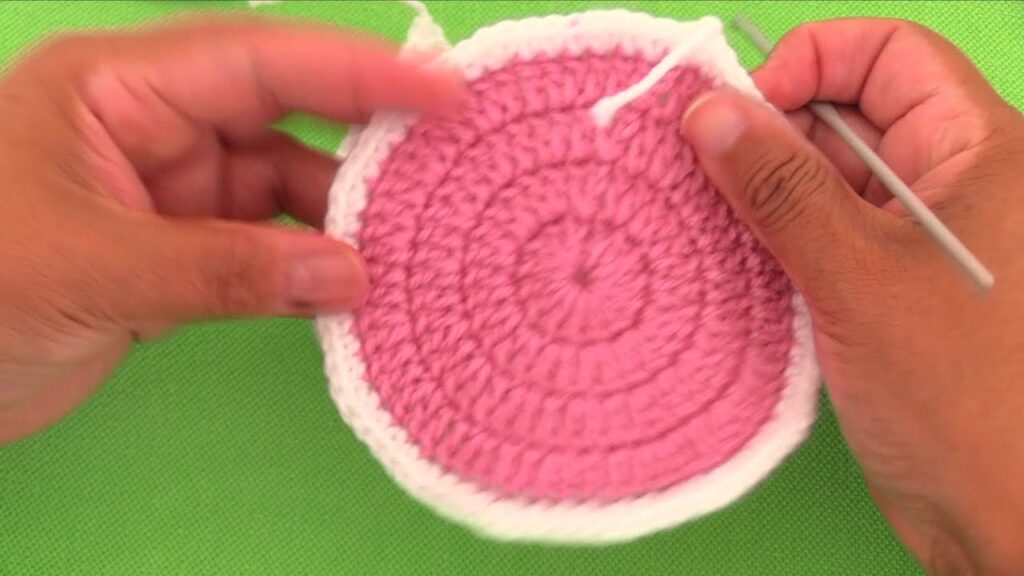
- Joining Yarn B: Join Yarn B to one side of the Bottom (B) circle. We will use a tight Single Crochet (SC) Join for maximum durability.
- Joining the Sides:
- Join L to B: Place the Left (L) circle next to the Bottom (B) circle. Align the petals carefully. Using the SC Join, work through both thicknesses of fabric along the seam where L and B meet. Work through the center point of the petals for the strongest join.
- Join R to B: Repeat the process, joining the Right (R) circle to the remaining side of the Bottom (B) circle.
- Join L to T: Join the Left (L) circle to the Top (T) circle.
- Join R to T: Join the Right (R) circle to the Top (T) circle.
- Closing the Back Seam: The Top (T) and Bottom (B) circles are now joined to the sides, but the back edges of L and R are still open. Join the back edge of the Left (L) circle to the back edge of the Right (R) circle, forming the final vertical seam and closing the main bag body.
- Reference Technique: The tight, seamless nature of the final join in the inspiration video (e.g., [00:11:15]) is key here for a clean look.
Your crocheted piece should now resemble a four-sided pouch with a rounded top opening, where the Petal edges create natural, rounded corners.
Stage 4: Finishing the Top Edge
We finish the bag with a sturdy channel for the drawstring.
- Defining the Top: Join Yarn B to the top edge of the bag (which is the combined unjoined edges of all four circles).
- Ribbing/Drawstring Channel:
- Round 1 (SC): Ch 1. Work 1 SC evenly into the top edge, ensuring the stitch count is a multiple of 4. Sl st to join.
- Round 2 (Ribbing): Ch 1. Work 1 Back Loop Single Crochet (BLSC) in every stitch around. Sl st to join. (This creates a ridge for the channel.)
- Round 3 (SC): Ch 1. Work 1 SC in every stitch around. Sl st.
- Round 4 (Ribbing): Ch 1. Work 1 BLSC in every stitch around. Sl st to join.
- Round 5 (Final SC): Ch 1. Work 1 SC in every stitch around. Sl st.
- Finish: Fasten off and weave in ends. This ribbed section creates the sturdy channel for your cord.
Stage 5: Drawstring and Lining
- Insert Drawstring: Weave your chosen cord or strap through the holes created by the Round 3 SC stitches (the round between the two ribbed rows). Weave it in and out all the way around, and then knot the ends together. Pulling the cord tight will cinch the bag closed.
- Lining (Optional): Cut the bag shape from your lining fabric, allowing for a hem around the top. Hand-sew the lining into the bag, securing it just under the final ribbed border. This is critical for preventing stretching and ensuring small items don’t slip through the stitches.
Section 4: Customization Corner (Making It Bloom)
- Different Weight Yarn: Use T-shirt yarn or rope for a much larger, structured storage basket by simply scaling up the number of increase rounds in Stage 1.
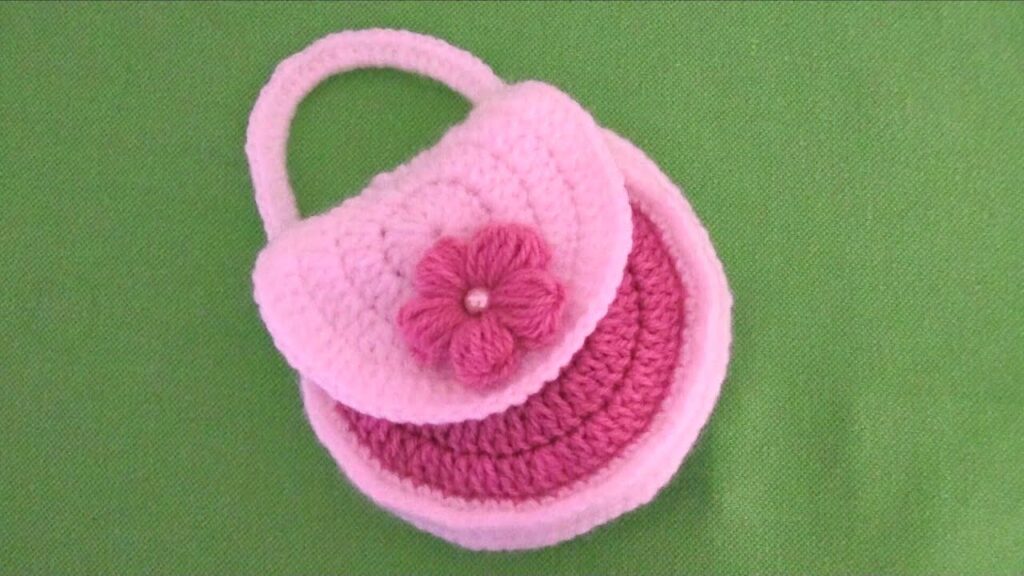
- Flower Accent: Attach a small, complementary crocheted flower (like the one demonstrated at the end of the inspiration video) to the center of one of the front petals for a decorative touch.
- Shoulder Strap: Instead of a drawstring, use a leather strap or a long, sturdy crocheted chain loop (using SC or DC) and attach it securely to the side seams of the bag opening for a crossbody look.
Conclusion: A Handmade Masterpiece
You have successfully crafted the Petal Pouch Modular Bag, a unique accessory that showcases the potential of simple shapes and careful joining. This design offers durability, style, and a charming floral touch—perfect for carrying small items or giving as a treasured gift.
Video tutorial:


