
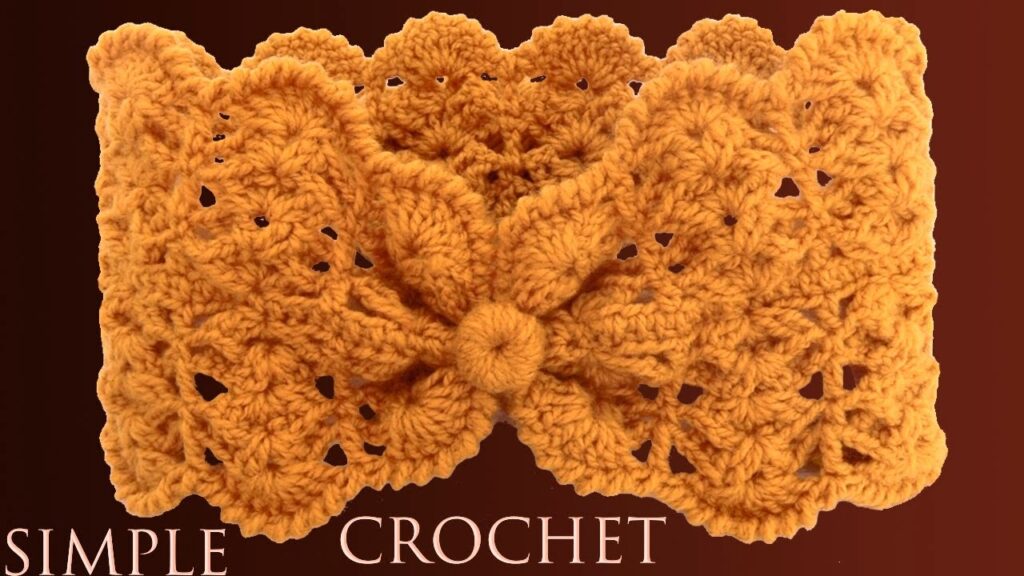
Crochet has evolved far beyond simple scarves and afghans—it has become a medium for intricate wearable art. Among the more whimsical and beautiful projects is the 3D crochet headband with a flower: a functional and fashionable accessory that combines comfort, warmth, and style with handmade charm. Whether you’re crafting for yourself, gifting to a loved one, or preparing items for a craft fair, a 3D flower headband is a quick yet impactful project that will surely impress.
In this article, we’ll explore:
- The appeal of 3D crochet
- Materials and tools you’ll need
- Step-by-step instructions for making the headband and flower
- Tips for customization
- Uses, styling ideas, and care instructions
Why Choose a 3D Crochet Headband?
3D crochet adds an element of depth and texture that makes any accessory stand out. A flat flower might be cute, but a three-dimensional bloom bursts off the fabric, adding dynamic flair. Here’s why a 3D flower headband is such a great project:
- Fast and satisfying: Most headbands take less than a day to complete.
- Beginner-friendly: With basic crochet stitches and just a few advanced techniques, it’s suitable for adventurous beginners.
- Highly customizable: You can vary the width, color, yarn type, and flower design.
- Perfect for gifts: Handmade accessories are always appreciated, and a 3D flower headband makes a thoughtful, personal gift.
- Fashion meets function: Keeps ears warm in cooler seasons while serving as a chic accessory.
Materials and Tools
You don’t need much to get started with a crochet 3D headband. Here’s a list of what you’ll need:
🧶 Yarn
- Worsted weight (Medium/Category 4) yarn is ideal for headbands. It offers enough structure without being bulky.
- Acrylic, cotton, or wool blends work well depending on the season.
- You can use one color or choose contrasting colors for the headband and flower.
🧵 Tools
- Crochet hook: Size H/8 (5.0 mm) is a good starting point for worsted yarn, but always check your yarn label.
- Yarn needle: For weaving in ends.
- Scissors
- Stitch markers (optional): Helps you keep track of rounds, especially for the flower.
Basic Techniques Used
If you’re comfortable with these stitches, you’re good to go:
- Chain (ch)
- Single Crochet (sc)
- Half Double Crochet (hdc)
- Double Crochet (dc)
- Slip Stitch (sl st)
- Magic Ring (or adjustable ring)
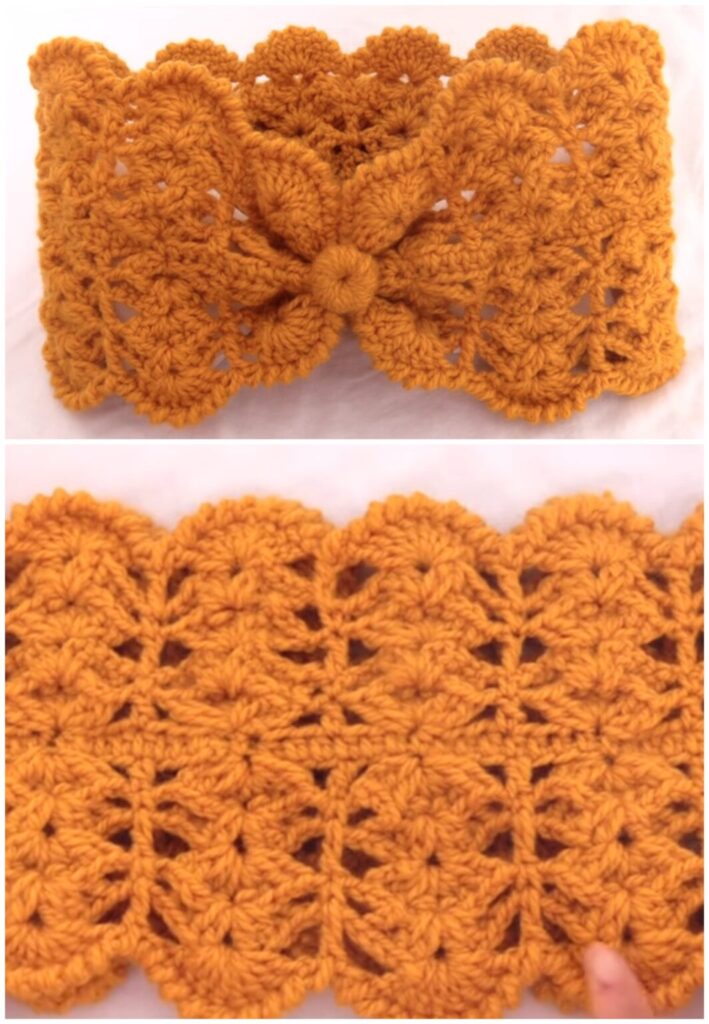
For the 3D flower, we’ll also use layered petal construction, which simply means crocheting multiple petal rounds on top of each other to create the 3D effect.
Part 1: Making the Headband
Step-by-Step Instructions
Step 1: Measure Your Head (or the Recipient’s)
Use a flexible tape measure around the forehead where the headband will sit. Most adult sizes range from 20 to 22 inches in circumference.
Step 2: Create a Foundation Chain
- Make a slip knot and chain until the chain measures your desired head circumference minus 1 inch (to account for stretch).
- For an average adult size: Chain 65 to 75 stitches.
- Be sure the number of chains is even, especially if you’re adding a pattern like ribbing.
Step 3: Join in the Round
- Being careful not to twist your chain, join with a slip stitch to the first chain to form a circle.
- Chain 1 to start the first round.
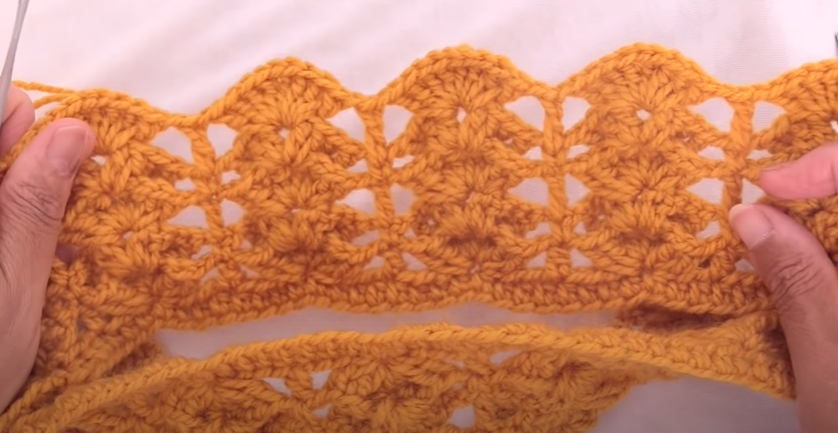
Step 4: Crochet the Body of the Headband
You can choose a basic stitch pattern or one that adds texture. Here’s a simple ribbed pattern:
Round 1:
- Single crochet in each stitch around. Join with a sl st to the first sc. Ch 1.
Round 2 (and onward):
- Single crochet in the back loop only (BLO) of each stitch around.
- Continue for 6–10 rounds, depending on the desired width.
Step 5: Finish Off
- Once you’ve reached your desired width, sl st into the first stitch, fasten off, and weave in the ends using a yarn needle.
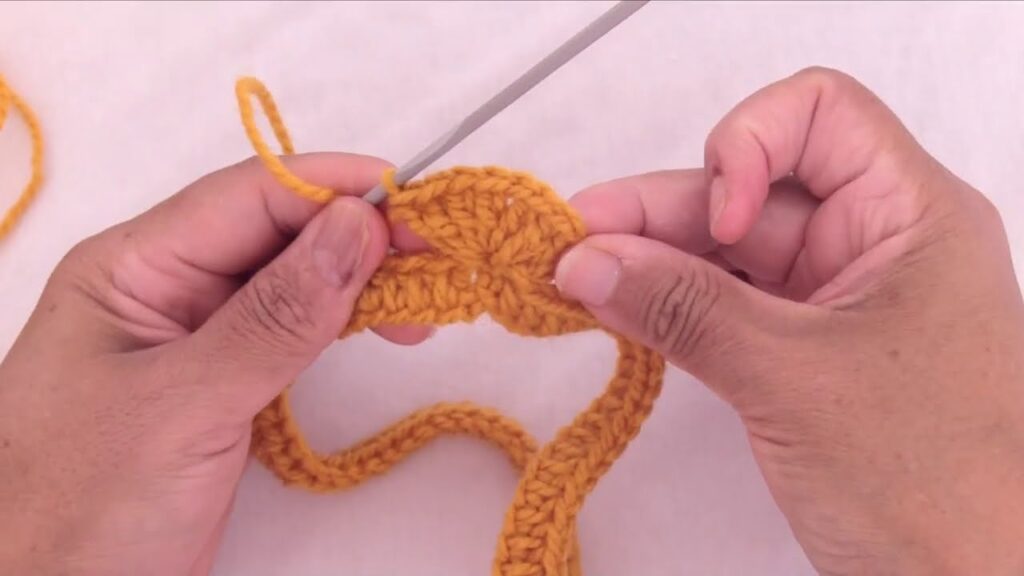
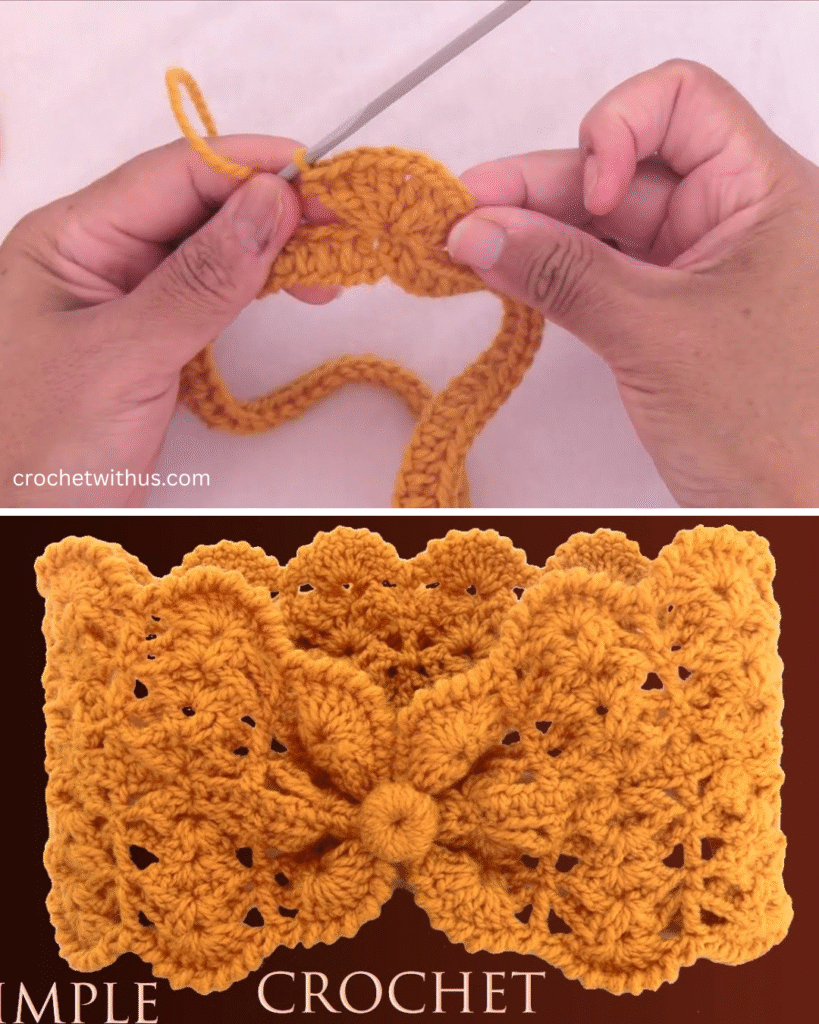
Part 2: Creating the 3D Flower
Classic Layered Rose Flower Pattern
Round 1: Magic Ring
- Into a magic ring, work: (ch 2, dc, ch 2, sl st) 6 times.
- This creates 6 small petals.
- Pull the ring tight to close the center. Do not fasten off—you’ll continue into Round 2.
Round 2: Working Behind Petals
- Ch 1, sc behind the first petal, ch 3. Repeat around behind each petal.
- You should now have 6 ch-3 spaces behind the first layer of petals.
Round 3: Second Layer of Petals
- In each ch-3 space, work: (ch 2, 2 dc, ch 2, sl st).
- This gives you 6 slightly larger petals behind the first row.
Round 4 (Optional): Third Layer
- Repeat the process again with ch-4 loops behind the second row of petals, working (ch 2, 3 dc, ch 2, sl st) in each loop.
This layering gives the flower a full, 3D appearance that “pops” off the headband.
Part 3: Attaching the Flower
There are several ways to attach your flower:
- Sew it on with yarn and a tapestry needle for permanent placement.
- Use a button base and add a button loop to the back of the flower to make it removable/interchangeable.
- Hot glue (non-washable): Best for display or costume purposes only.
Position the flower to one side of the headband for an asymmetrical, stylish look.
Optional Embellishments
- Leaves: Crochet small leaves in green and sew them around the flower.
- Pearl or bead center: Sew a bead into the middle of the flower for sparkle.
- Contrasting edging: Add a row of slip stitches or single crochet in a contrasting color around the edges of the headband.
Customization Ideas
| Element | Customization Ideas |
|---|---|
| Color | Monochrome, pastels, ombré yarn, or bold contrasts |
| Flower Type | Try daisies, sunflowers, or layered rosettes |
| Yarn Type | Use velvet for a luxe feel, cotton for summer, or wool for winter warmth |
| Size | Make narrower or wider versions for kids or babies |
| Texture | Use front-post/back-post stitches for a textured headband base |
Styling Tips
- Wear with hair down for a cozy, boho look.
- Pair with matching crochet mittens or a scarf.
- Add to a winter ensemble or wear over your ears on a chilly autumn walk.
- Make multiple flowers and switch them out depending on the outfit.
Washing and Care Instructions
- Hand wash in cold water with mild detergent.
- Lay flat to dry to maintain shape.
- Avoid machine washing, especially if your flower includes buttons or beads.
Final Thoughts
The crochet 3D headband with flower is a blend of functionality and decorative flair. It’s a great project that allows you to explore texture, color, and 3D design within the relaxing rhythm of crochet. Whether you’re crafting a cozy winter accessory or a fun springtime fashion statement, this headband will be a cherished addition to anyone’s wardrobe—or craft fair table.
So grab your yarn and hook, and let your creativity bloom—literally!
Video tutorial:


