Crochet granny squares are timeless, versatile, and perfect for everything from blankets to bags and cardigans. If you’re looking to add a whimsical and feminine touch to your next crochet project, flower granny squares are a beautiful choice. These delightful motifs combine the charm of blossoms with the practicality of squares, and when joined together, they create a stunning fabric full of texture and color.
In this guide, we’ll walk you through:
- Materials you’ll need
- Step-by-step instructions to make a flower granny square
- How to join the squares together
- Creative ideas for using your finished squares
🧶 Materials You’ll Need
Before we begin crocheting, gather the following supplies:
🧺 Yarn:
- Worsted weight (Medium #4) cotton or acrylic yarn in at least two colors:
- Color A: For the flower center
- Color B: For the flower petals
- Color C: For the background square
You can use leftover yarn or a coordinated color palette for a cohesive look.
🧷 Tools:
- Crochet hook: Size H/5.0mm (adjust depending on your yarn)
- Scissors
- Yarn needle (for weaving in ends)
- Stitch markers (optional)
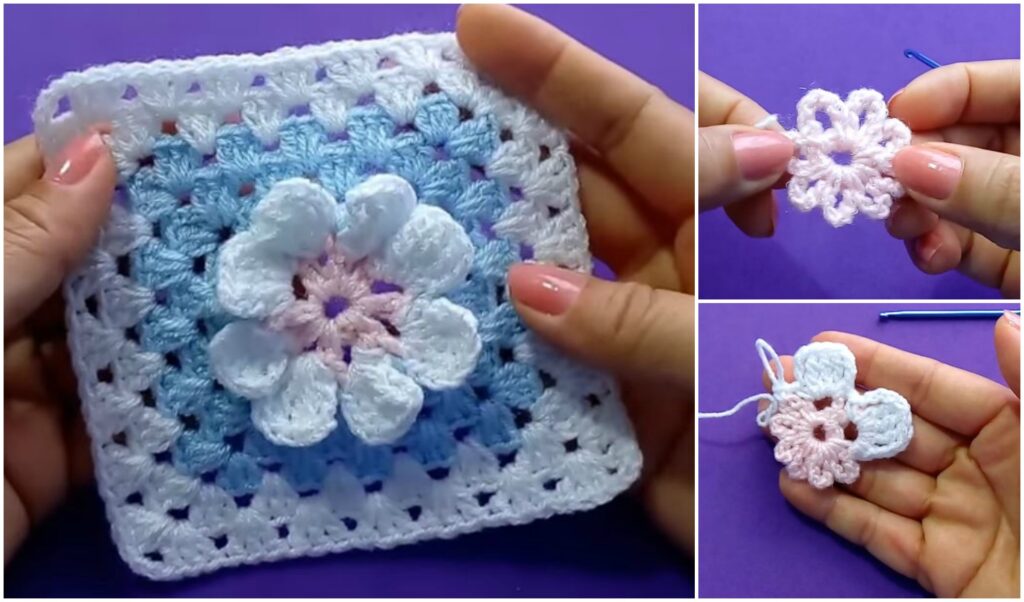
🌼 Part 1: How to Crochet a Flower Granny Square
We’ll break down the flower granny square into three parts:
- Center of the flower
- Petal round
- Square base around the flower
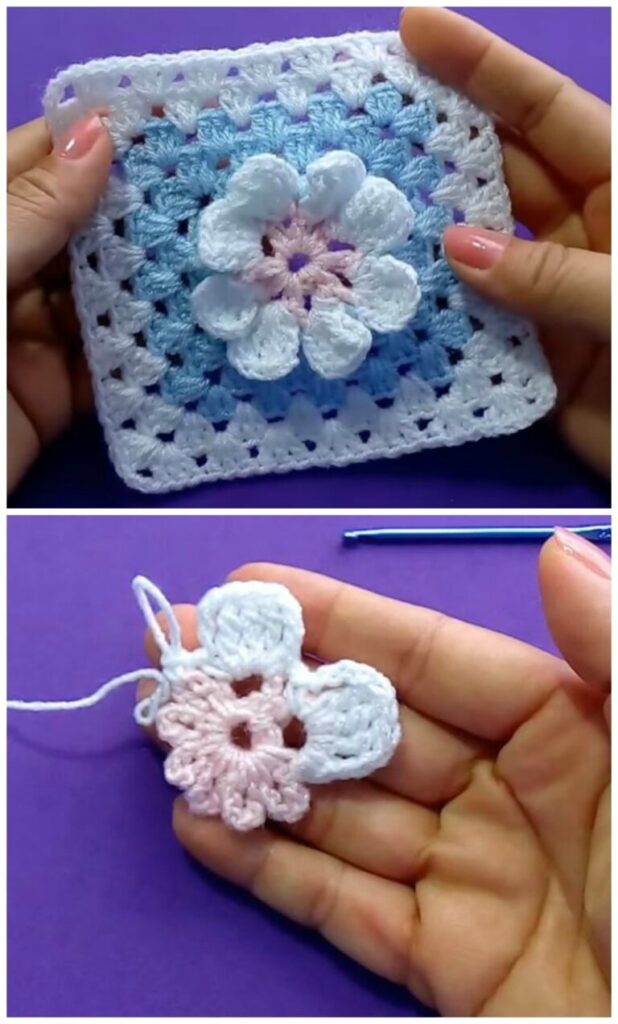
🔹 Round 1: Flower Center (Color A)
- Make a magic ring (or ch 4 and sl st into the first ch to form a ring).
- Ch 3 (counts as 1 dc), work 11 dc into the ring. (12 dc total)
- Sl st to the top of the starting ch-3 to close the round.
- Fasten off and change to Color B.
✅ Tip: If you want a puffier flower, substitute puff or bobble stitches for regular dc.
🔸 Round 2: Flower Petals (Color B)
- Attach Color B to any stitch from Round 1.
- Ch 2, in the same st: work 2 dc, ch 2, sl st in same st — this forms a petal.
- Skip next stitch, sl st in the next stitch, and repeat the petal pattern in that stitch.
Repeat this around for a total of 6 petals. (You’ll work into every other stitch.)
- Sl st to the base of the first petal to close.
- Fasten off and change to Color C.
🧵 Optional Variation: For fuller flowers, make 8 petals by working into every stitch instead of every other.
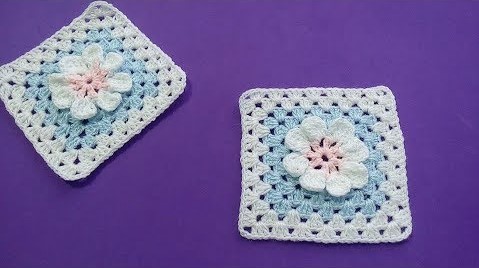
🟩 Round 3: Turning It Into a Square (Color C)
Now we’ll crochet a square shape around the circular flower.
- Join Color C in any ch-2 space (tip of a petal).
- Ch 3 (counts as 1 dc), in same space work 2 dc.
- In the space between two petals, work 1 dc.
- Next petal’s ch-2 space: work 3 dc, ch 2, 3 dc (this creates a corner).
- Continue this pattern:
- 1 dc between petals
- 3 dc, ch 2, 3 dc in each petal’s tip for corners
Repeat this until you’ve made 4 corners, shaping the square.
- Sl st to the top of the beginning ch-3.
- Fasten off and weave in ends.
Congratulations! You’ve just completed one adorable flower granny square! 🌸
🧩 Part 2: How to Join Flower Granny Squares
Once you’ve made multiple squares, it’s time to join them. There are a few popular methods depending on the finish you prefer.
✨ 1. Slip Stitch Join (Flat Seam)
- Place two squares right sides together.
- Insert hook through both loops of each stitch on both squares.
- Sl st across, working one sl st in each pair of stitches.
- Repeat for all squares.
Result: Flat and neat join, great for wearable items.

✨ 2. Single Crochet Join (Textured Ridge)
- Place two squares wrong sides together.
- Single crochet through both loops of each stitch.
- This creates a raised ridge on the front side, adding texture.
Best for decorative or bold outlines.
✨ 3. Join-As-You-Go (JAYG)
- Instead of making and then joining all squares, crochet the final round of each square while connecting it to the adjacent square(s).
- At each corner or side stitch that needs joining, slip stitch into the adjacent square’s stitch, then continue crocheting your current square.
Great for reducing time spent sewing and creating a seamless look.
🎨 Creative Ideas for Using Flower Granny Squares
Now that you know how to make and join flower granny squares, here are some charming project ideas:
- Baby blankets: Soft, sweet, and timeless
- Cushion covers: Brighten up any room with floral charm
- Market bags: Use sturdy yarn for a retro-chic accessory
- Cardigans or shrugs: Combine dozens of squares into a beautiful garment
- Table runners or placemats: Perfect for spring and summer decor
- Wall hangings: Mix colors for a boho-inspired art piece
You can also experiment with yarn weights and hook sizes for different effects. Bulky yarn makes cozy throws; finer yarn creates delicate motifs.
🧼 Care and Blocking Tips
To make your flower granny squares lay flat and look professional:
- Block each square before joining.
- Spray lightly with water and pin onto a foam mat.
- Allow to dry completely.
- Weave in ends securely to avoid unraveling.
- Wash your final project gently according to yarn type.
🌟 Final Thoughts
Flower granny squares are more than just crochet motifs—they’re a celebration of creativity, color, and the joy of handmade beauty. Whether you’re making a cozy blanket or a delicate shawl, these squares offer endless potential.
With this guide, you now know how to:
- Make a detailed flower granny square
- Join your squares using multiple techniques
- Explore creative applications for your work
So grab your hook, pick your favorite yarn shades, and start stitching your own garden of granny squares today. 🌼🧶
Video tutorial:


