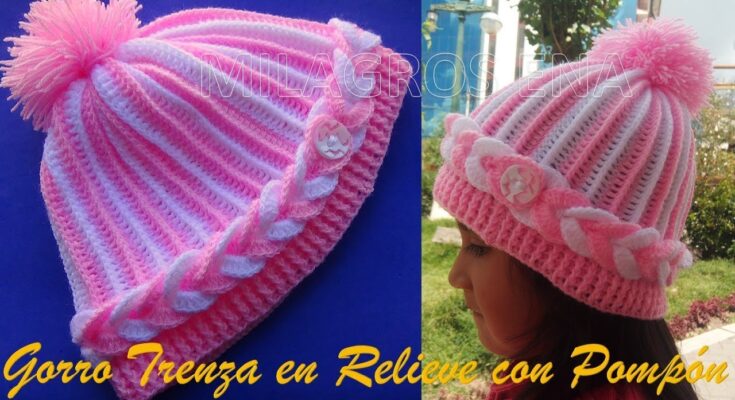
A crochet hat with a pompon (or pom-pom) is a delightful and fun accessory that adds a touch of charm and whimsy to any outfit. Perfect for cold weather, this cozy hat is not only stylish but also a practical addition to your wardrobe. With a few basic crochet skills, you can create this hat in no time! Whether you’re a beginner or an experienced crocheter, this project is simple, customizable, and full of creative potential.
🧶 Materials Needed
- Worsted weight yarn (choose a soft and warm yarn, like wool or acrylic)
- Crochet hook (recommended size 5.0 mm or 6.0 mm)
- Yarn needle
- Scissors
- Pompon maker or a piece of cardboard (for making the pom-pom)
- Measuring tape (optional)
📘 Abbreviations (US Terms)
- CH – Chain
- SC – Single Crochet
- DC – Double Crochet
- HDC – Half Double Crochet
- SL ST – Slip Stitch
- ST – Stitch
- FO – Fasten Off

🌸 Step-by-Step Pattern for a Crochet Hat with Pompon
Step 1: Make the Foundation Chain
- Start by making a foundation chain that fits comfortably around your head. To do this, measure your head circumference with a measuring tape and chain the number of stitches that will match the circumference. For an adult-sized hat, chain approximately 60-70 stitches, but adjust based on the size you want.
- Join the foundation chain into a ring by slip-stitching into the first chain, being careful not to twist the chain.
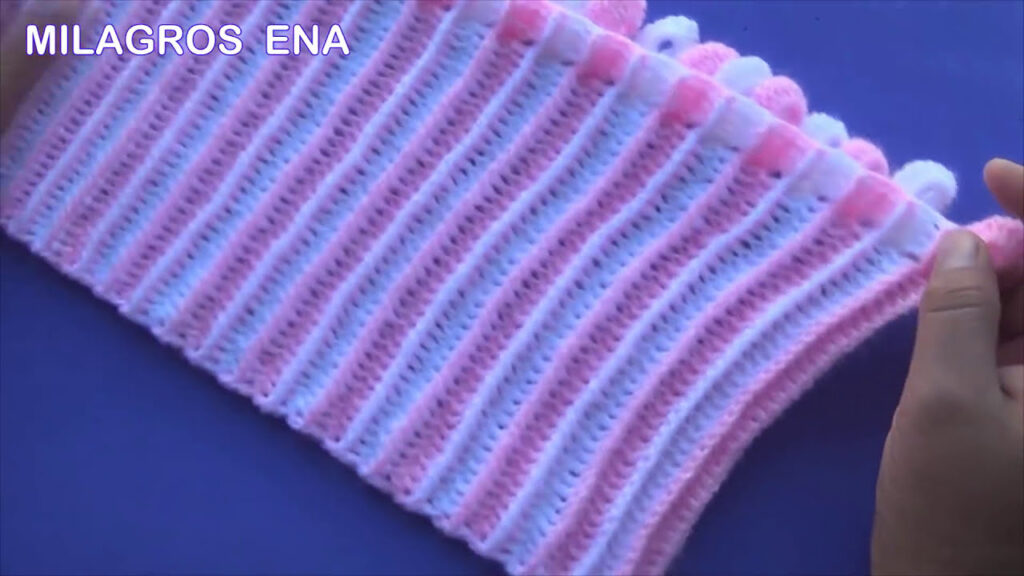
Step 2: Crochet the Body of the Hat
- Round 1: CH 2 (counts as first HDC), HDC in each chain around. Join with a SL ST to the top of the beginning CH 2.
- Round 2: CH 2 (counts as first HDC), HDC in the next stitch and in each stitch around. Join with a SL ST to the top of the beginning CH 2.
- Round 3 and onwards: Repeat Round 2 until your hat reaches the desired height, typically around 6-7 inches for a standard adult size. You can add a few more rounds for a longer, slouchy look.
Step 3: Shape the Top of the Hat
To finish the top of the hat, decrease the number of stitches to close up the crown.
- Round 1 (Decrease): CH 2 (counts as HDC), HDC in the next 6 stitches, then HDC2TOG (half double crochet two together). Repeat around.
- Round 2 (Decrease): CH 2 (counts as HDC), HDC in the next 5 stitches, HDC2TOG. Repeat around.
- Continue decreasing every round by reducing the number of HDC between decreases until there are only a few stitches remaining.
- Fasten off the yarn, leaving a long tail. Use a yarn needle to close the top of the hat by threading the tail through the remaining stitches and pulling tight.
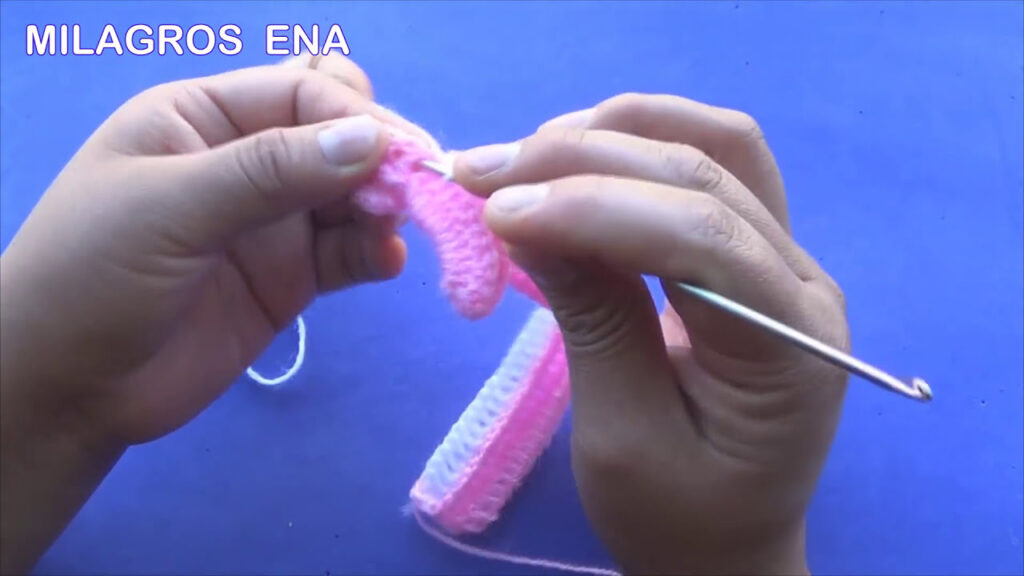
Step 4: Make the Pompon
- To make the pompon, you can use a pompom maker or create one by wrapping yarn around a piece of cardboard.
- Wrap the yarn around the pompom maker (or cardboard) until you have a nice, fluffy ball of yarn. The more yarn you wrap, the fluffier your pompon will be.
- Once you’ve finished wrapping, tie a knot in the middle to secure the yarn. Cut the loops on either side and trim the pompon to a neat, round shape.
Step 5: Attach the Pompon to the Hat
- Use the yarn tail left from your pompon to attach it securely to the top of the hat.
- Thread the yarn through the top of the hat and pull it through until the pompon is centered.
- Tie a knot to secure the pompon in place, and trim any excess yarn.

🎨 Customization Ideas
- Color Variations: Choose a yarn color that complements your winter wardrobe or go for bold, contrasting colors to make a statement. You can also make the hat and pompon in two different colors for a fun and playful look.
- Textured Stitches: Add extra texture to the hat by incorporating other crochet stitches like the shell stitch or front post stitches for a more unique look.
- Slouchy or Beanie Style: Adjust the length of the hat for a snug fit or make it slouchier by adding a few more rows before decreasing.
- Pompon Size: Make your pompon bigger or smaller depending on how bold you want your hat to be. A large pompon gives a fun, statement look, while a small pompon keeps things cute and subtle.
🌟 Tips for Success
- Adjust Fit: Before you finish the body of the hat, make sure to try it on and check for the right fit. If it’s too tight or loose, adjust the number of stitches in the foundation chain.
- Use Soft Yarn: Opt for yarn that’s soft and cozy for comfort, especially if you plan to wear the hat for extended periods.
- Tighten Your Stitches: Make sure your stitches are tight to avoid gaps in the fabric, especially for the crown of the hat.

✨ Conclusion
A crochet hat with pompon is a wonderful accessory for both beginners and experienced crocheters. It’s quick, easy, and customizable, allowing you to add a touch of fun and warmth to your wardrobe. With a simple geometric design and the playful addition of a pompon, this hat can easily become a go-to item for chilly weather. Plus, making your own hat ensures that it’s one-of-a-kind and perfectly suited to your style.
So grab your crochet hook, pick out some yarn, and start creating your cozy, pompom-topped hat today! 🎀🧶
Video tutorial:
Happy Crocheting! 🌸


