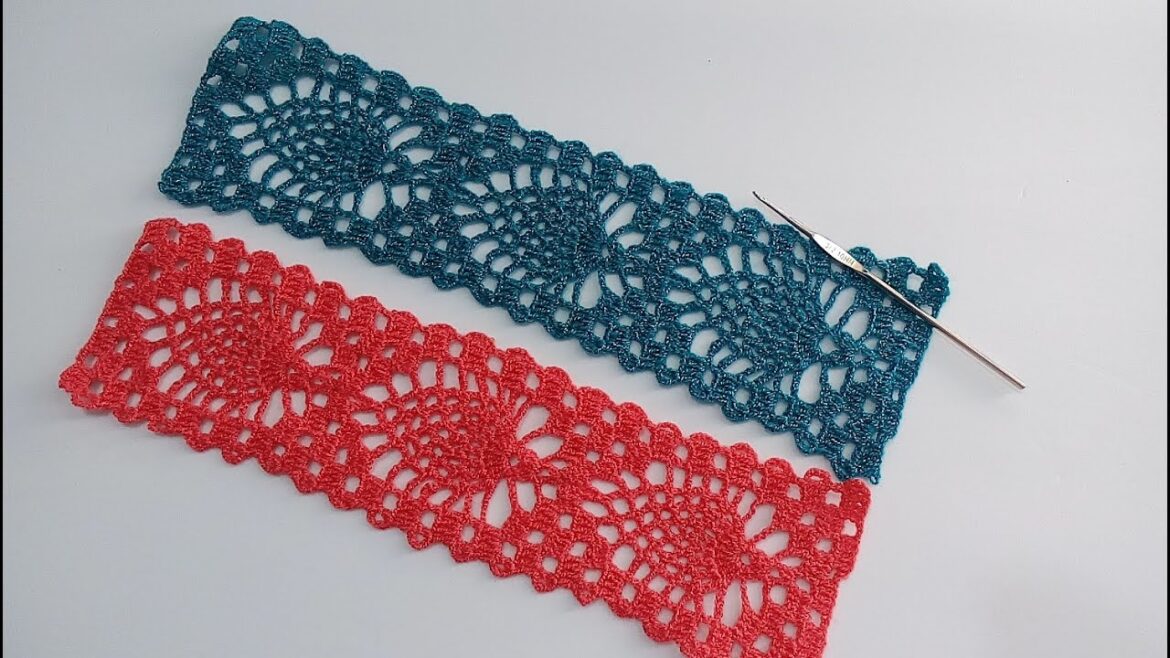
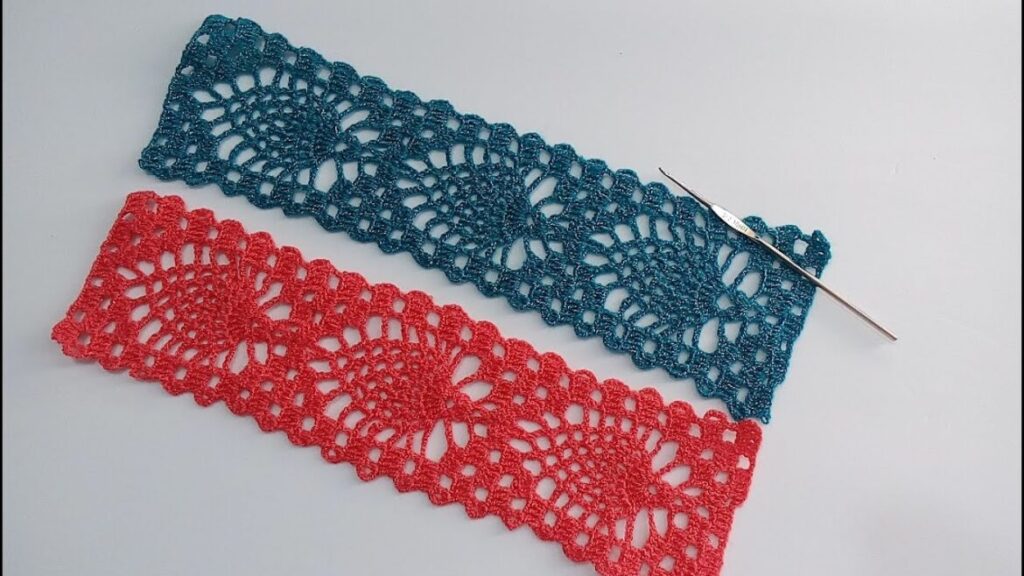
The pineapple motif is one of the most beloved and classic designs in crochet. Its elegant, lacy structure and natural, organic look make it perfect for adding a decorative touch to any project. A crochet pineapple border can elevate everything from blankets and shawls to table runners and garments. In this guide, you’ll learn how to create a beautiful pineapple border step-by-step, whether you’re edging a handmade piece or giving new life to a store-bought item.
🧶 Materials Needed
- Lightweight or medium-weight yarn (cotton yarn is ideal for crisp details)
- Crochet hook suitable for your yarn (usually 3.5 mm to 5.0 mm)
- Yarn needle
- Scissors
- Measuring tape (optional)
📘 Abbreviations (US Terms)
- CH – Chain
- SC – Single Crochet
- DC – Double Crochet
- TR – Treble Crochet
- SL ST – Slip Stitch
- ST – Stitch
- SK – Skip
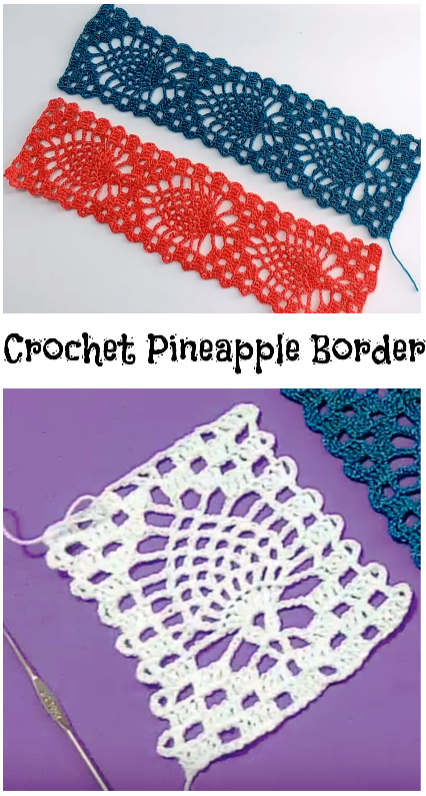
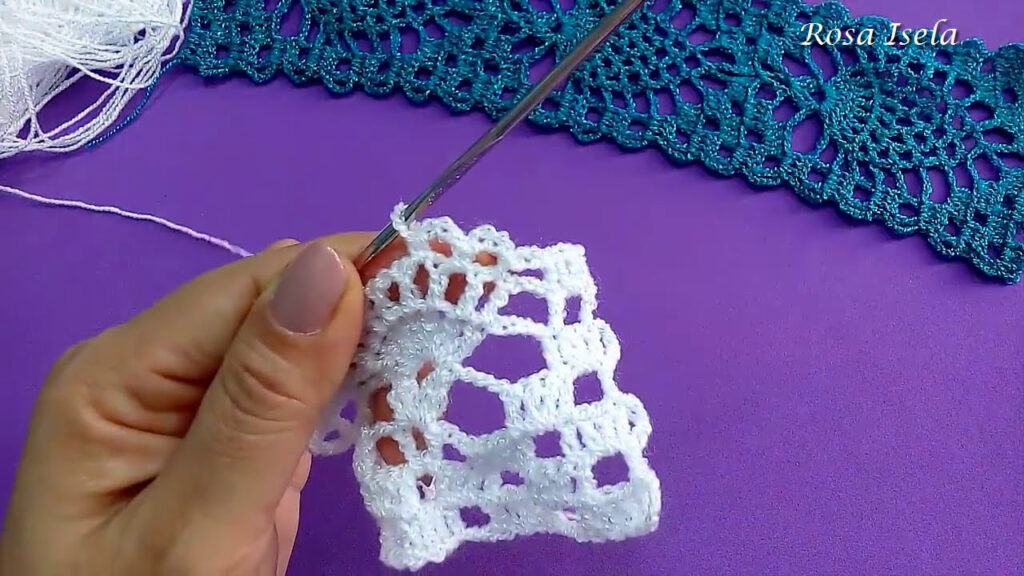
🍍 Basic Crochet Pineapple Border Pattern
Foundation Row
- Attach yarn to the edge of your project.
- CH 1, SC evenly around the edge where you want to add the border.
- Join with a SL ST to the first SC.
Set-Up Row
- CH 5 (counts as 1 DC + CH 2), SK 2 STS, DC in next ST, CH 2, SK 2 STS, DC in next ST; repeat around.
- This creates small spaces where the pineapples will form.
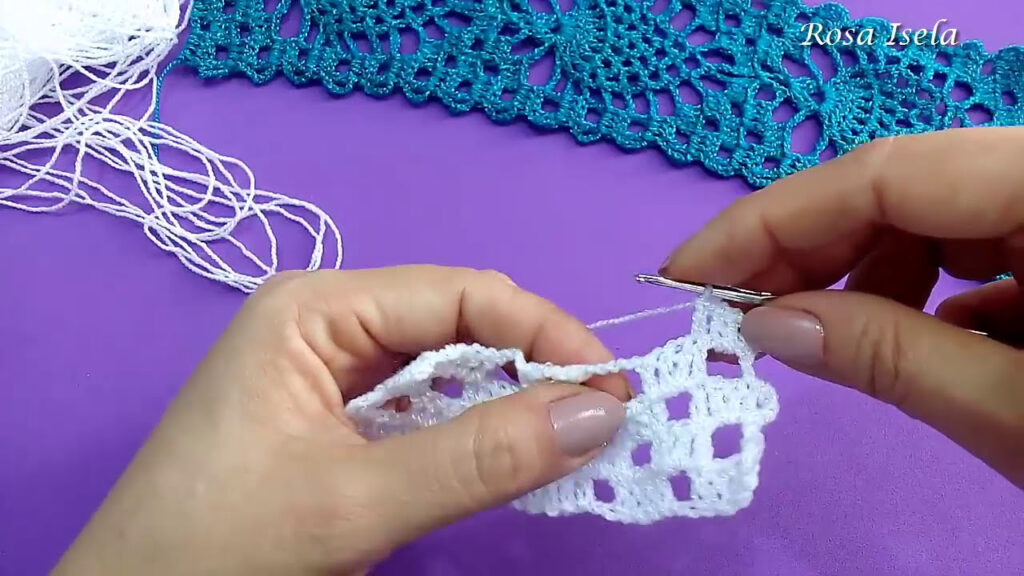
Creating the Pineapple Shape
- Row 1:
- SL ST into the first CH-2 space, CH 3 (counts as DC), DC in same space, CH 2, 2 DC in next CH-2 space; repeat around.
- Row 2:
- SL ST into space between the 2 DC clusters, CH 3, (1 DC, CH 2, 2 DC) in same space.
- Repeat (2 DC, CH 2, 2 DC) into each CH-2 space around.
- Row 3 and Onward:
- In each CH-2 space from the previous row, work (2 DC, CH 2, 2 DC) again.
- You will notice the pineapple shape starting to grow wider.
- Shaping the Tip:
- As you add rows, decrease by working fewer DC into the CH spaces or by skipping some spaces between motifs.
- Eventually, you’ll work a final SC or SL ST at the tip to finish the pineapple.
- Finishing:
- Once the pineapple is fully formed and looks complete, fasten off and weave in your ends.
- Block your piece lightly to open up the lace and show off the pineapple design.
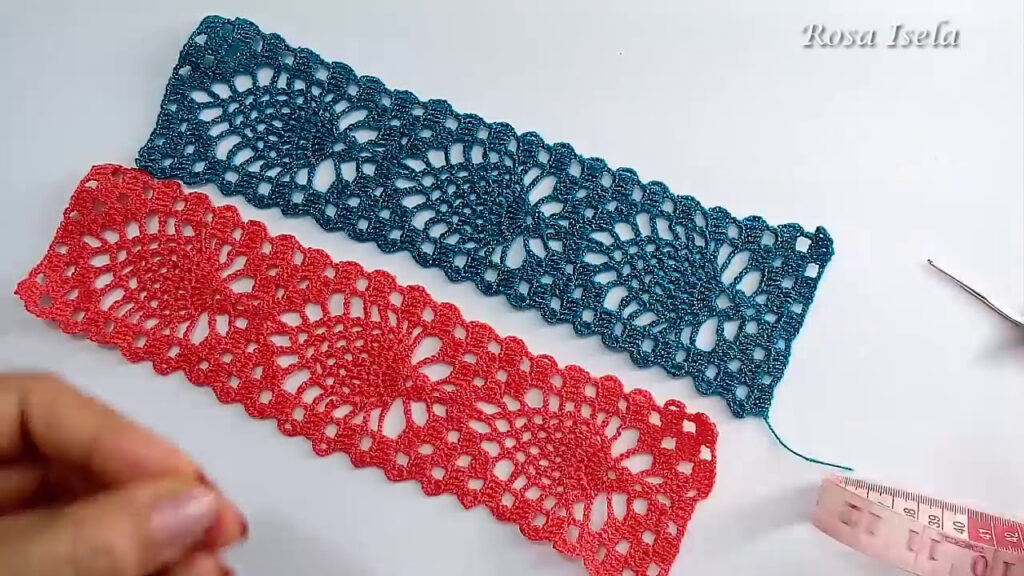
🎨 Creative Ways to Use Pineapple Borders
- Blankets: Add an elegant touch to the edge of baby blankets or throws.
- Table Runners: Turn a plain runner into a conversation piece.
- Shawls and Wraps: Pineapple borders give a lightweight, flowing finish.
- Garments: Perfect for finishing hems of skirts, cardigans, or sleeves.
- Home Decor: Use around the edges of pillows, curtains, or bedspreads.
🏡 Tips for a Perfect Pineapple Border
- Gauge Matters: A lighter yarn and smaller hook will create a more delicate, lacy border.
- Blocking: Always block pineapple motifs to fully reveal their intricate beauty.
- Consistency: Maintain consistent tension for even stitches, especially important for lacy designs.
- Practice First: Try making a few practice pineapples on a scrap piece before adding them to your main project.
✨ Conclusion
The crochet pineapple border is a timeless, delicate design that brings an extra level of beauty and craftsmanship to any crochet project. Once you get into the rhythm of creating the pineapple shapes, it becomes an enjoyable and satisfying stitch pattern to work. Whether you’re embellishing a cozy throw or creating a stunning wrap, the pineapple border is sure to leave a lasting impression.
Video tutorial:
Happy Crocheting! 🧶🍍


