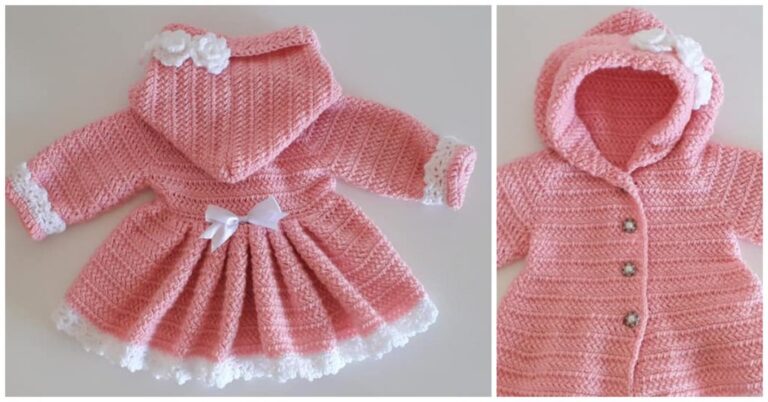
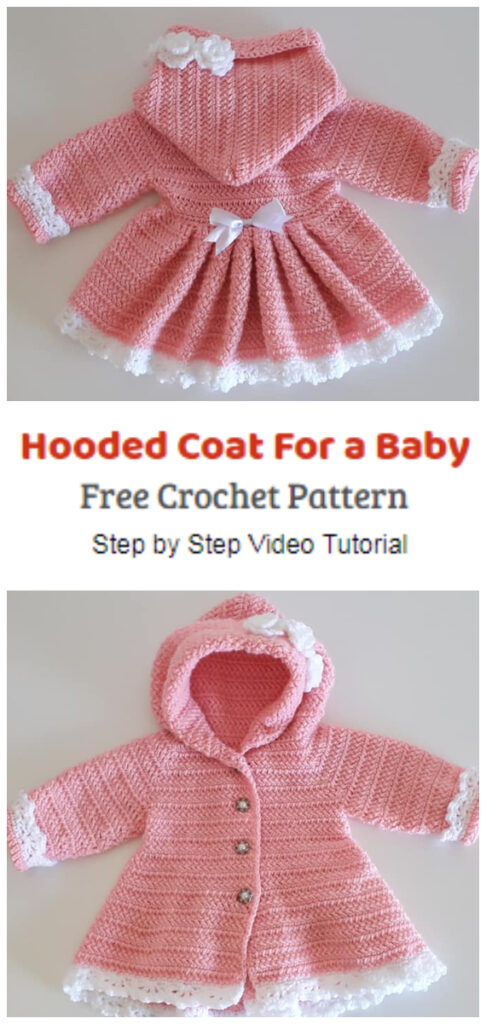
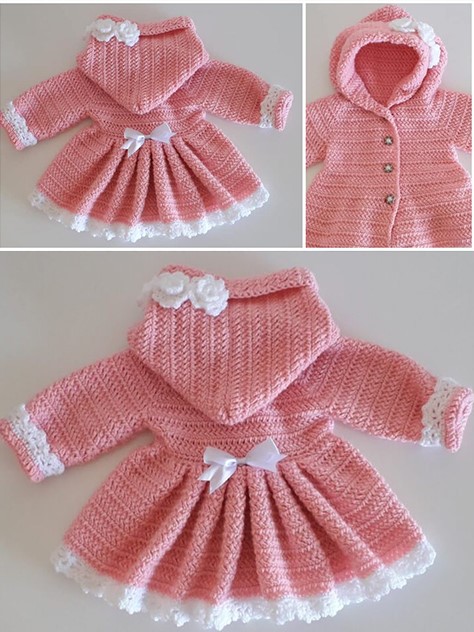
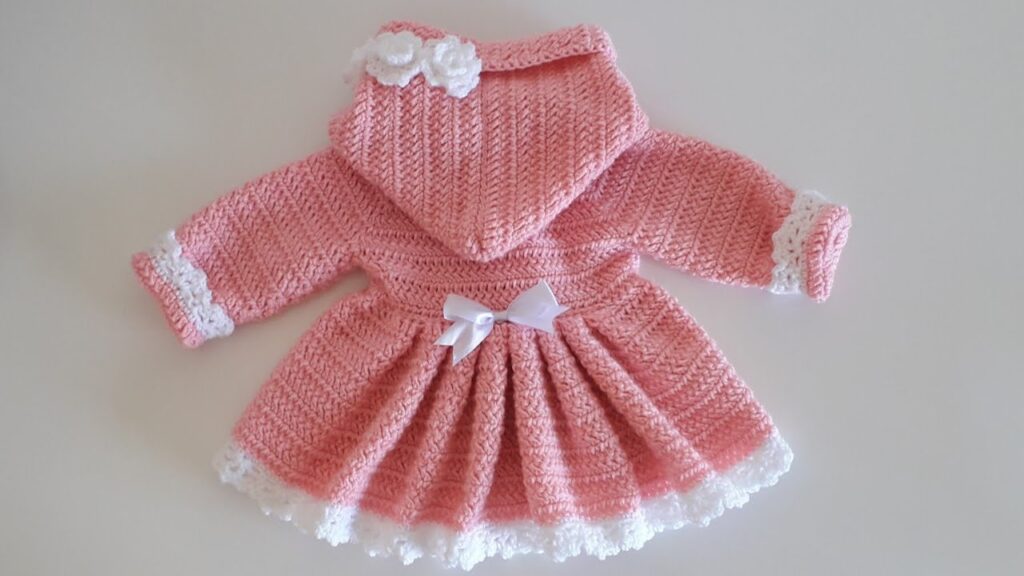
How to Crochet a Hooded Coat for a Baby: A Step-by-Step Guide
Crocheting a hooded coat for a baby is a rewarding and heartfelt project, perfect for keeping little ones warm while adding a touch of handmade charm. This guide will take you through the process, from selecting materials to assembling the final piece.
Materials Needed:
- Yarn: Soft, baby-friendly worsted-weight yarn (approx. 500–700 yards, depending on size)
- Hook: Size H (5.0 mm) or size recommended for your yarn
- Scissors
- Yarn needle
- Stitch markers
- Buttons or toggles for closure (optional)
- Measuring tape
Step 1: Choosing the Right Size
Determine the baby’s age and size to ensure a proper fit. Approximate measurements for different sizes:
- Newborn: Chest 16 inches, length 12 inches
- 3–6 months: Chest 18 inches, length 14 inches
- 6–12 months: Chest 20 inches, length 16 inches
Adjust your stitch count accordingly for larger or smaller coats.
Step 2: Creating the Back Panel
- Foundation Chain: Chain the desired width (e.g., 30 chains for a 6-month size).
- Rows: Work in half double crochet (HDC) or double crochet (DC) stitches for the desired length (e.g., 30 rows for a 6-month size).
- Fasten off and weave in ends.
Step 3: Making the Front Panels
- Foundation Chain: Chain half the width of the back panel plus 2 extra stitches.
- Rows: Work in HDC or DC, maintaining the same length as the back panel.
- Make a second identical front panel.
- Neckline Shaping: On the last 5 rows, decrease 2 stitches per row at the neckline side.
Step 4: Making the Sleeves
- Foundation Chain: Chain the required width for the sleeve (e.g., 20 chains for a 6-month size).
- Rows: Work in HDC or DC, increasing 1 stitch at the beginning and end of every 4th row for a natural sleeve shape.
- Continue until the sleeve reaches the correct length (e.g., 24 rows).
Step 5: Assembling the Coat
- Join Front and Back Panels: Lay them flat and stitch the shoulders together.
- Attach the Sleeves: Line up the sleeves with the armholes and use a slip stitch or whipstitch to join them.
- Sew the Side Seams: Fold the coat and stitch from the wrist to the underarm, then down to the bottom hem.
Step 6: Creating the Hood
- Foundation Chain: Chain the width of the neckline (approx. 30 chains).
- Rows: Work in HDC or DC for 20 rows, or until it forms a rectangle that can fold into a hood.
- Shaping: Fold in half and stitch along the top edge.
- Attach the Hood: Align the hood with the neckline and stitch it in place.
Step 7: Adding Finishing Touches
- Edging: Work a row of single crochet around the coat and hood for a polished look.
- Closures: Sew buttons or add a crochet tie for fastening.
- Decorative Touches: Add a pom-pom, scalloped edges, or embroidered details.

Final Thoughts
Your baby’s hooded coat is now complete! This cozy and adorable garment makes a perfect handmade gift and can be customized with colors and embellishments to match any style.
Happy Crocheting!
Video tutorial:


